Jumper of dreams

Taking pictures is hard to do…

Ah, the jumper of dreams! This one was a long time in the making but absolute happiness in the wearing. The pattern is the glorious Fern and Feather by Jennifer Steingass. When I was knitting this for my best friend’s birthday last year (no picture, sorry!), I saw this amazing colour way by tempolinse and I found I just couldn’t get it out of my head.

Navy jumpers are my jam and a yoked navy jumper, well there was just going to be no stopping me! I knit this in Lettlopi, partly because I love it as a wool, but also because I already had the grey and white fade colours left over from previous projects. For me Lettlopi is affordable, warm and pretty much just a joy to knit with. Thoroughly recommended!

Although the pattern calls for more positive ease, I knew I wanted my jumper to fit closer to the body so I knitted the second size (basically no ease) with the smaller neckline. I’ll admit this could have ended badly and there was a pretty hairy point midway where I thought it was going to be too small! One of the best bits of knitting top down jumpers, though, is that you can try it on as you go and that was brilliant for checking the fit and getting the length I wanted.

I made no modifications to the body but I did go a bit bonkers on the sleeve. I’ve a chubbier upper arm and I was a bit concerned that knitting a smaller size would give me sausage casing sleeves. My improv solution to this was to spread out the arm decreases a bit more and in the final jumper, this has largely worked out pretty well. No sausage sleeves but when I got to the end of decreasing, I realised I needed to cast off pretty much immediately to get a normal arm length.

When I finished the jumper, I gave it a good wash in the Shetland Soap Company Wool Wash and then stretched it out a bit. The fit was exactly what I was looking for and I am completely in love with this jumper. It goes with nearly everything in my wardrobe (cheers navy!) and I’ve worn it everywhere – work, nights out, the cinema, the pub, working in the garden, hiking, and in the photos at the top of this post, straight after swimming in the North Sea!

I have a tendency to cast on and knit shiny, random things without enough thought about how they might fit in with what I actually wear and what I will get the most use out of. It’s something I’ve been consciously trying to change and this jumper is a huge step forward for me in that respect. It’s one of the most flexible items in my wardrobe and an utter joy to wear. If you haven’t done it already, knit one. You won’t regret it.

Helpful Information

  • Pattern – Fern and Feather by Jennifer Steingass 
  • Modifications – Altered the rate of decreases on the sleeve to make it slightly looser around the bicep. It worked but since I completely winged it, I wouldn’t recommend my method!

Materials

Cardigans For Days…

I was very eager in the January sales and stocked up on yarn for 3 cardigans for Tiny Sleep Thieves. In theory this was great, some no rush projects (I got wool for 6-9 month sizes, babies were between three months and yet to arrive) at sale prices. I forgot that 3 months with a baby goes by in seconds so my ‘no rush’ projects ended up feeling a bit like homework and by the time I finished the 3rd my Tiny Sleep Thief was 9 months (and a bit!). But no matter, fortunately the cardigan still fitted and I had fun along the way.

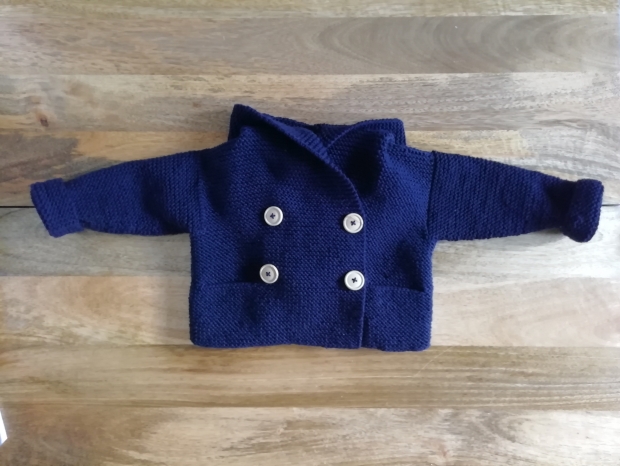
I’ve already blogged about the first one here. A lovely simple ‘Duffle Coat’ pattern by Debbie Bliss.

Navy knitted duffle coat/jumper with wooden buttons

Great fun to knit, made up pretty quickly and looked grand (if I say so myself).

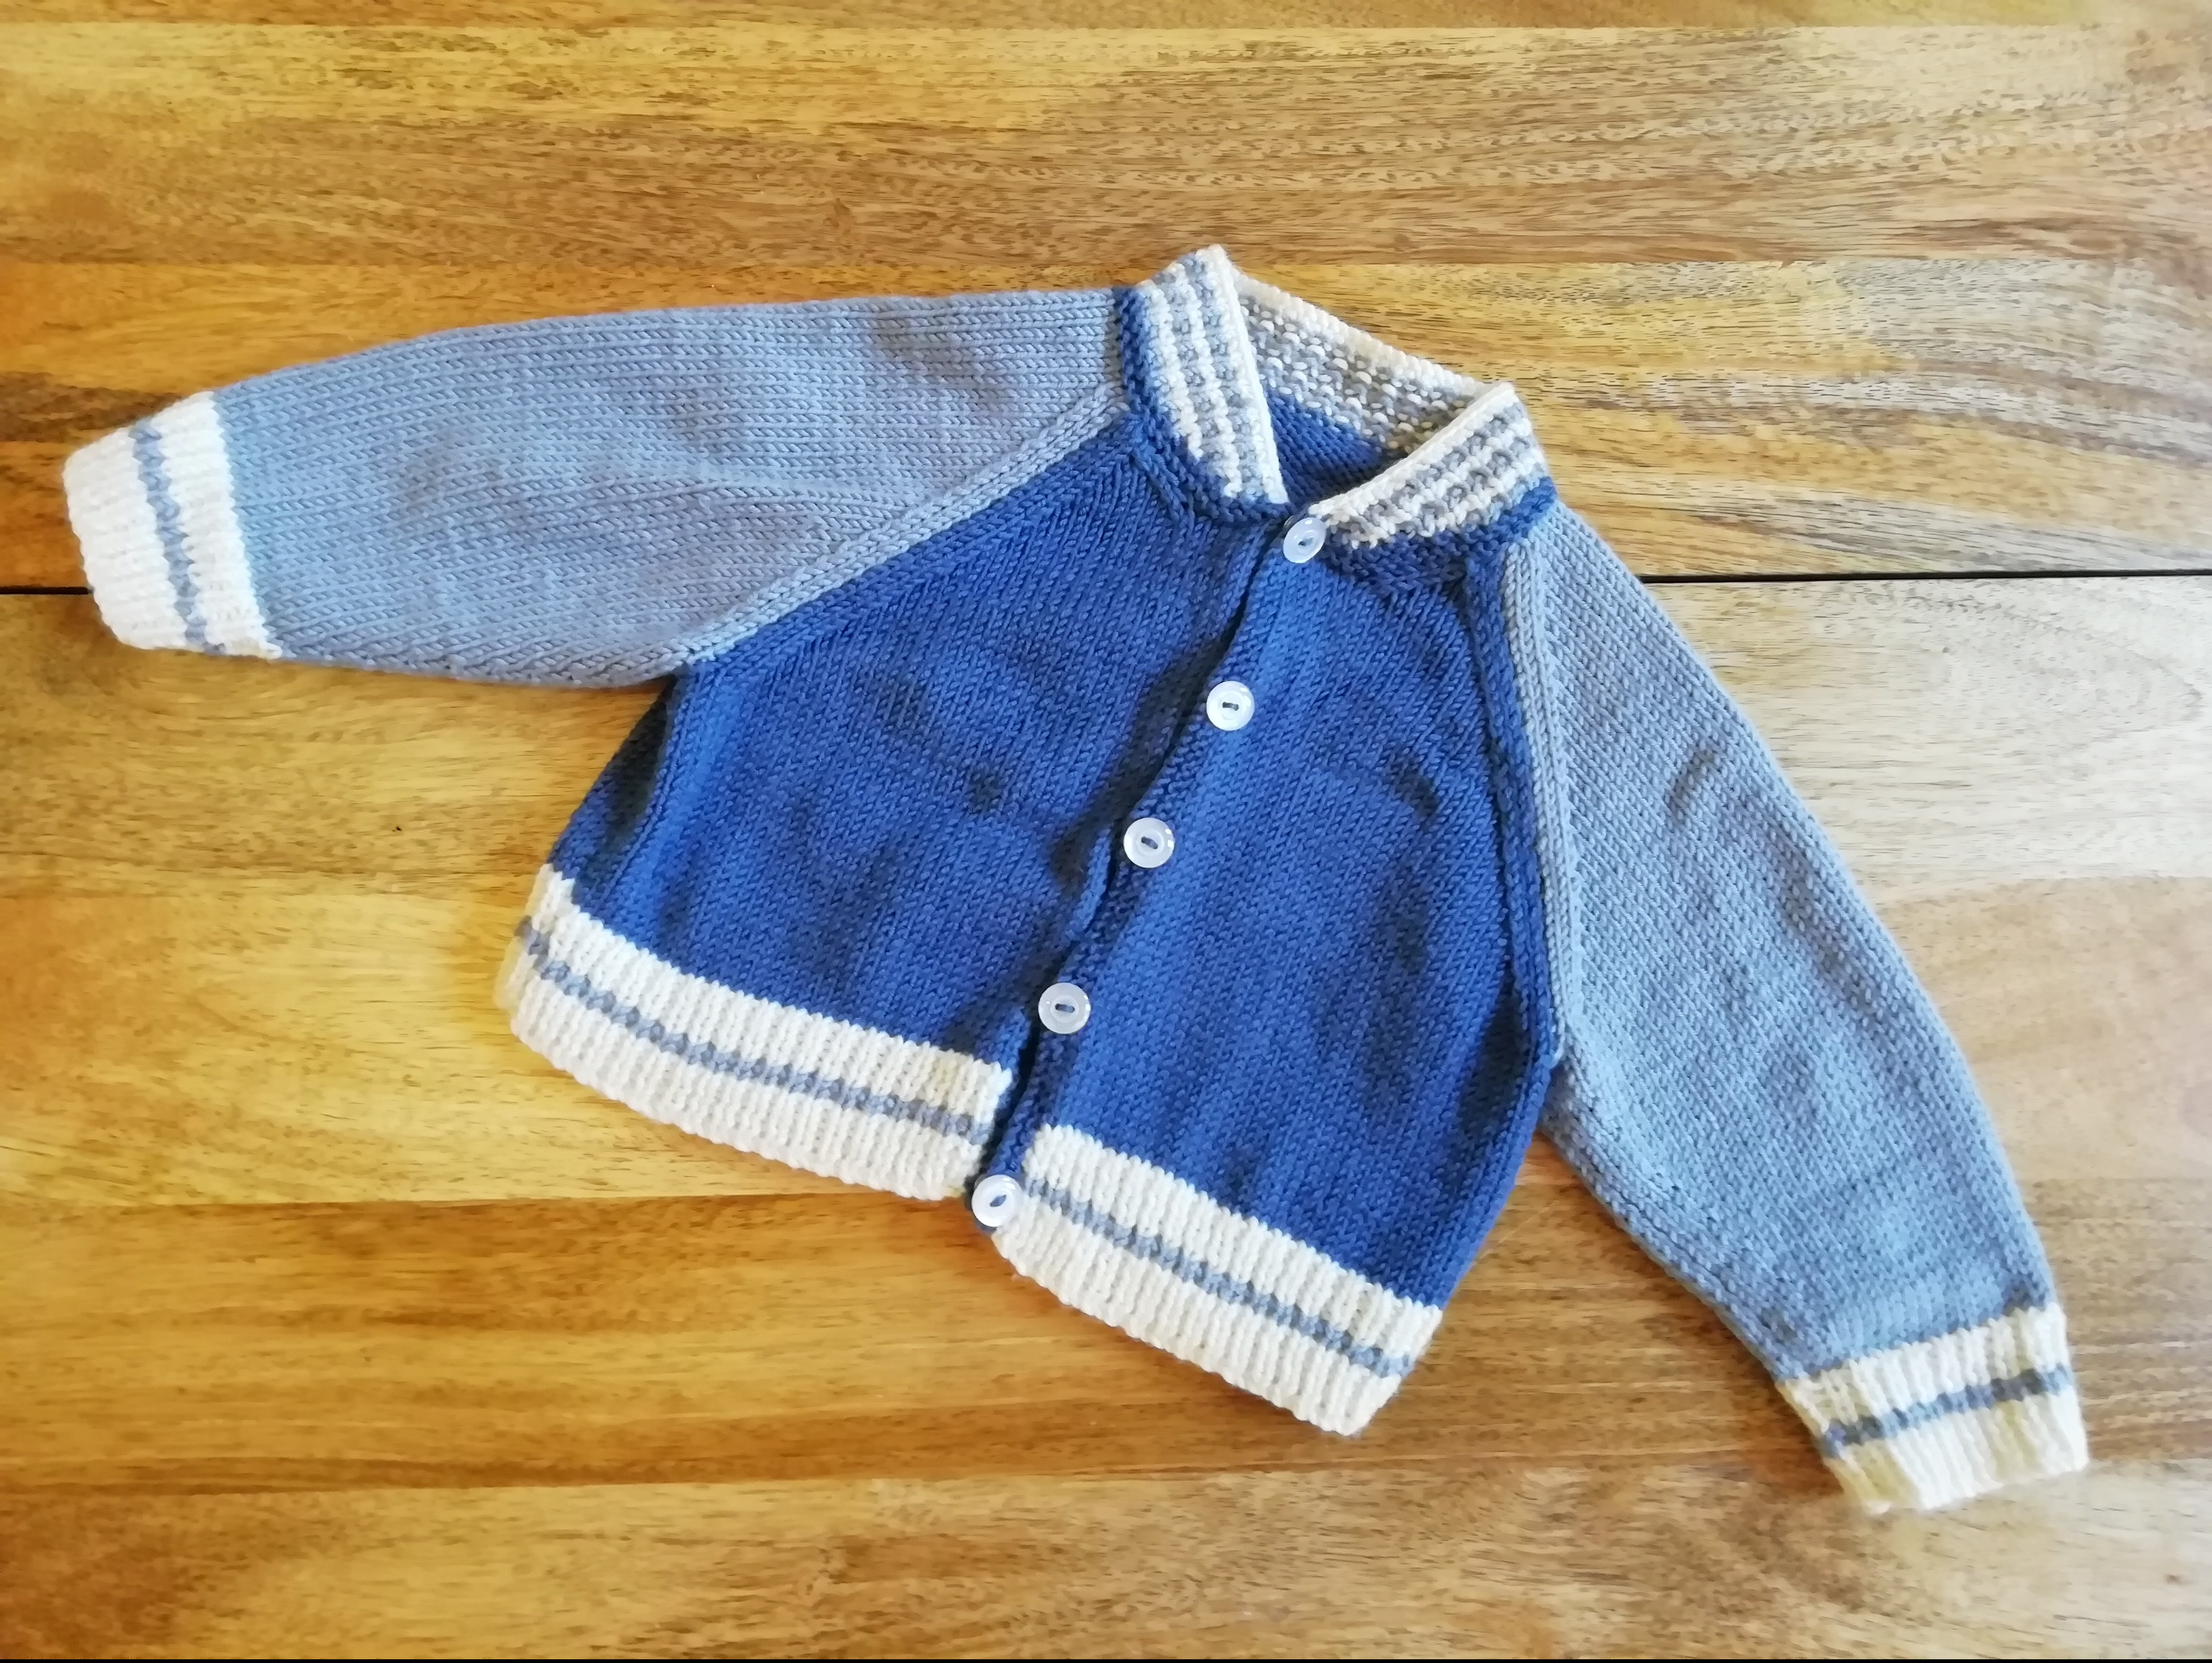
Next I tackled a baby Baseball Jacket again by Debbie Bliss. I’ve made it before so I felt pretty confident as I cast on. It’s another one that’s fun and straight forward to knit, the instructions are well written and you can do it in front of the tele without getting too lost.

Baby Baseball Jacket knitted in Denim, Mist and Ecru

I decided to do poppers instead of buttons because I think they’re easier and less fiddly generally but I mounted them with buttons on the top and to be honest, I’m not totally thrilled with how that worked out. I’m not sure if I just used too small a size or if it’s the bulk of a button sewed on top of a popper but I think it’s actually ended up being fiddlier. Hey ho. You live and you learn and it looks good (I think), so that’s a win.

Overall I was pretty pleased with the jacket but now that I have a small person of my own to test wear, I realise the importance of tension. I think I’ve knitting levelled up again, my last level up was the importance of Blocking and this knit has taught me the importance of Gauge…I know, I know, most people got there years ago! I think I was close to getting it right but the sleeves are just a tiny bit long compared to the body so it’s not quite right. Obviously this isn’t a problem, you just roll them up…but… I know. So when I embarked on project 3, I bit the bullet and swatched properly for the first time ever.

Swatching has always been something I’ve avoided, I’m too excited to get going, I tend to knit things where gauge isn’t super important and frankly…I find it a bit boring. I know there are things you can do like knitted bunting etc so that the swatch work isn’t wasted but as I don’t particularly want a house full of knitted bunting I don’t tend to do that. Sometimes I’ll start with a sleeve and claim that is my swatch but when I measure it up and realise that the count isn’t quite right I usually assume it will be fine and keep going. Oh, knitter’s hubris! So I read up, as usual on Tin Can Knits‘ wonderful blog and, feeling incredibly virtuous, started knitting swatches.

Turns out I can’t knit to gauge. The suggested needles gave me a loser gauge, smaller needles gave me a slightly tighter gauge. No matter I thought, it’s all in the blocking after all. I washed, I blocked, I googled gauge squares and added one to my Christmas list, I patiently waited for the swatches to dry. Then, with a small sense of trepidation I measured again. Lo and behold, still not the right gauge. Cue head scratching. In the end I decided to crack on with the needles that got me closest needles and just not worry about it – some things never change.

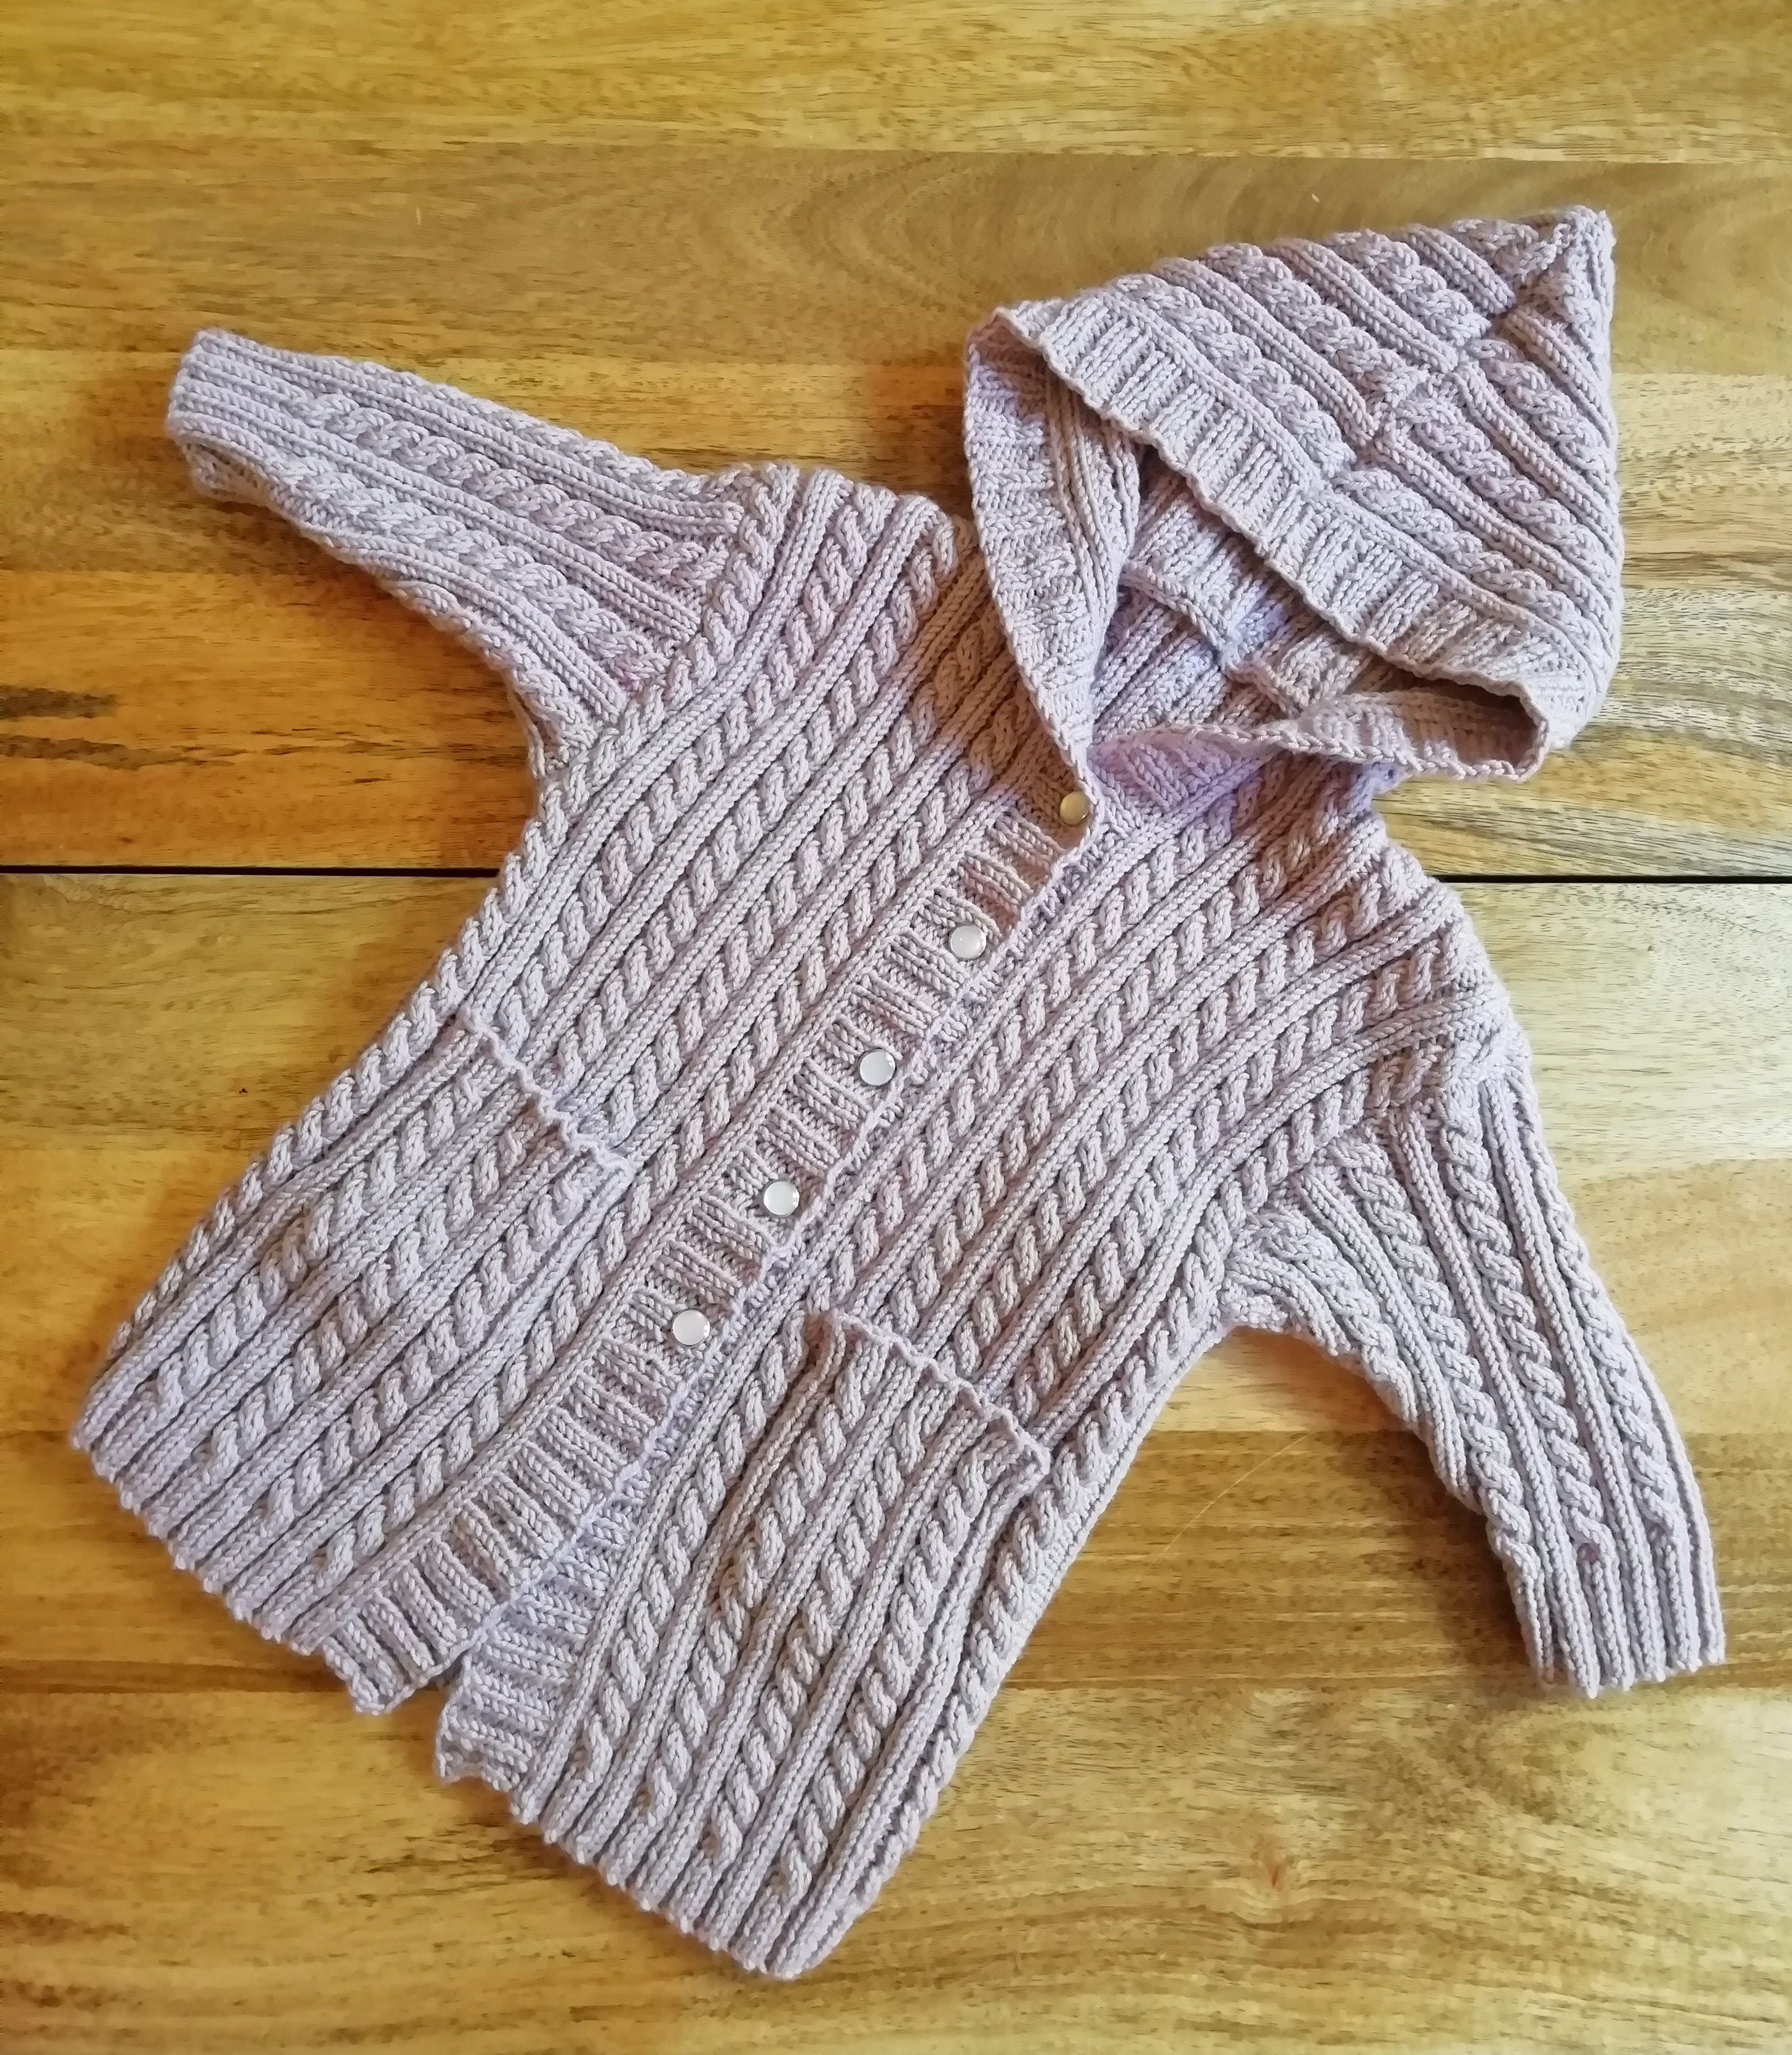
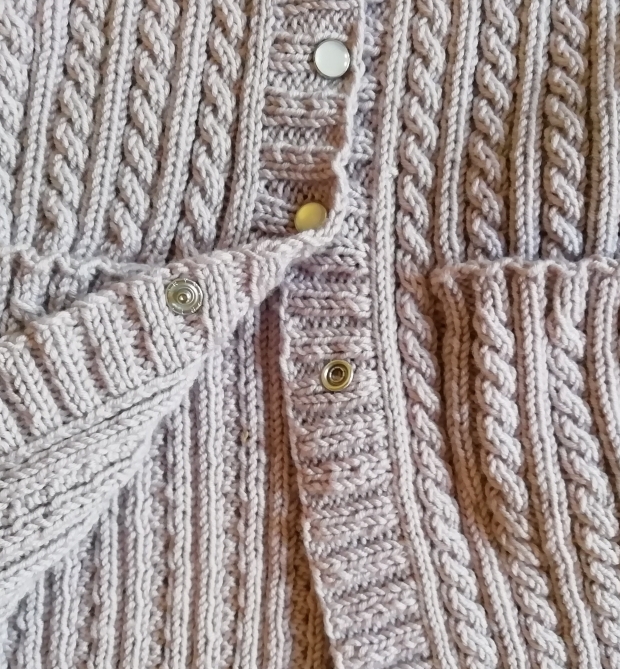
Baby Hooded Cardigan, a cabled pattern where I used poppers instead of buttons
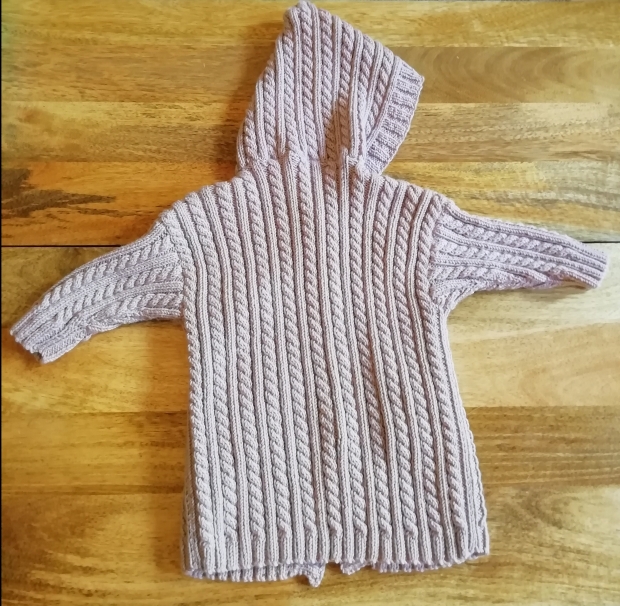
The back of a hooded cabled cardigan

The other thing I had learned from the knitted baseball jacket was that hand sewn poppers weren’t the solution I had hoped they would be so I invested in a Prym Popper Tool (not it’s real name – I think it’s called a Press Stud but does anyone actually call them that?!). This was a slightly terrifying experience as the pre-installed poppers have quite sharp teeth and it involved clamping them in place with the tool then hammering them to secure them* but it was, successful and worth it. They are well secured and look great as well as being easy to use. I think I probably still need to experiment a bit more to get them totally perfect, the pull of poppers on knitted material etc might mean after wear that they aren’t ideal but I’ll keep you posted.

*you can buy another tool to use so you don’t have to hammer but I didn’t know this before I set out and the instructions on the box are not the best. I ended up YouTubing to make sure I had got it right.

Detail of Cables and Poppers on baby cardigan

In conclusion, will I swatch again? Yes, probably. Will I worry if my swatches aren’t the right gauge? No, no I will not. Does this mean things won’t always fit? Yes, definitely. Is this all part of the learning curve and fun of knitting? Yes, definitely.

Knitted Duffle Pattern and Materials

  • Pattern
  • 3.25mm and 4mm needles
  • 4 buttons
  • DK wool – I used Debbie Bliss Rialto DK in Navy (17)

Baseball Jacket Pattern and Materials

  • Pattern
  • 3mm and 3.25mm needles
  • 5 fasteners (buttons or poppers)
  • 4ply wool – I used Debbie Bliss Baby Cashmerino in Ecru (101), Denim (27) and Mist (57)

Cabled Coat with Hood Pattern and Materials

  • Pattern
  • 2.75mm and 3.25mm needles
  • 5 poppers (original pattern recommends 7 buttons)
  • 4ply – I used Debbie Bliss Baby Cashmerino Pale Lilac (608)

Baabling

IMG_6365

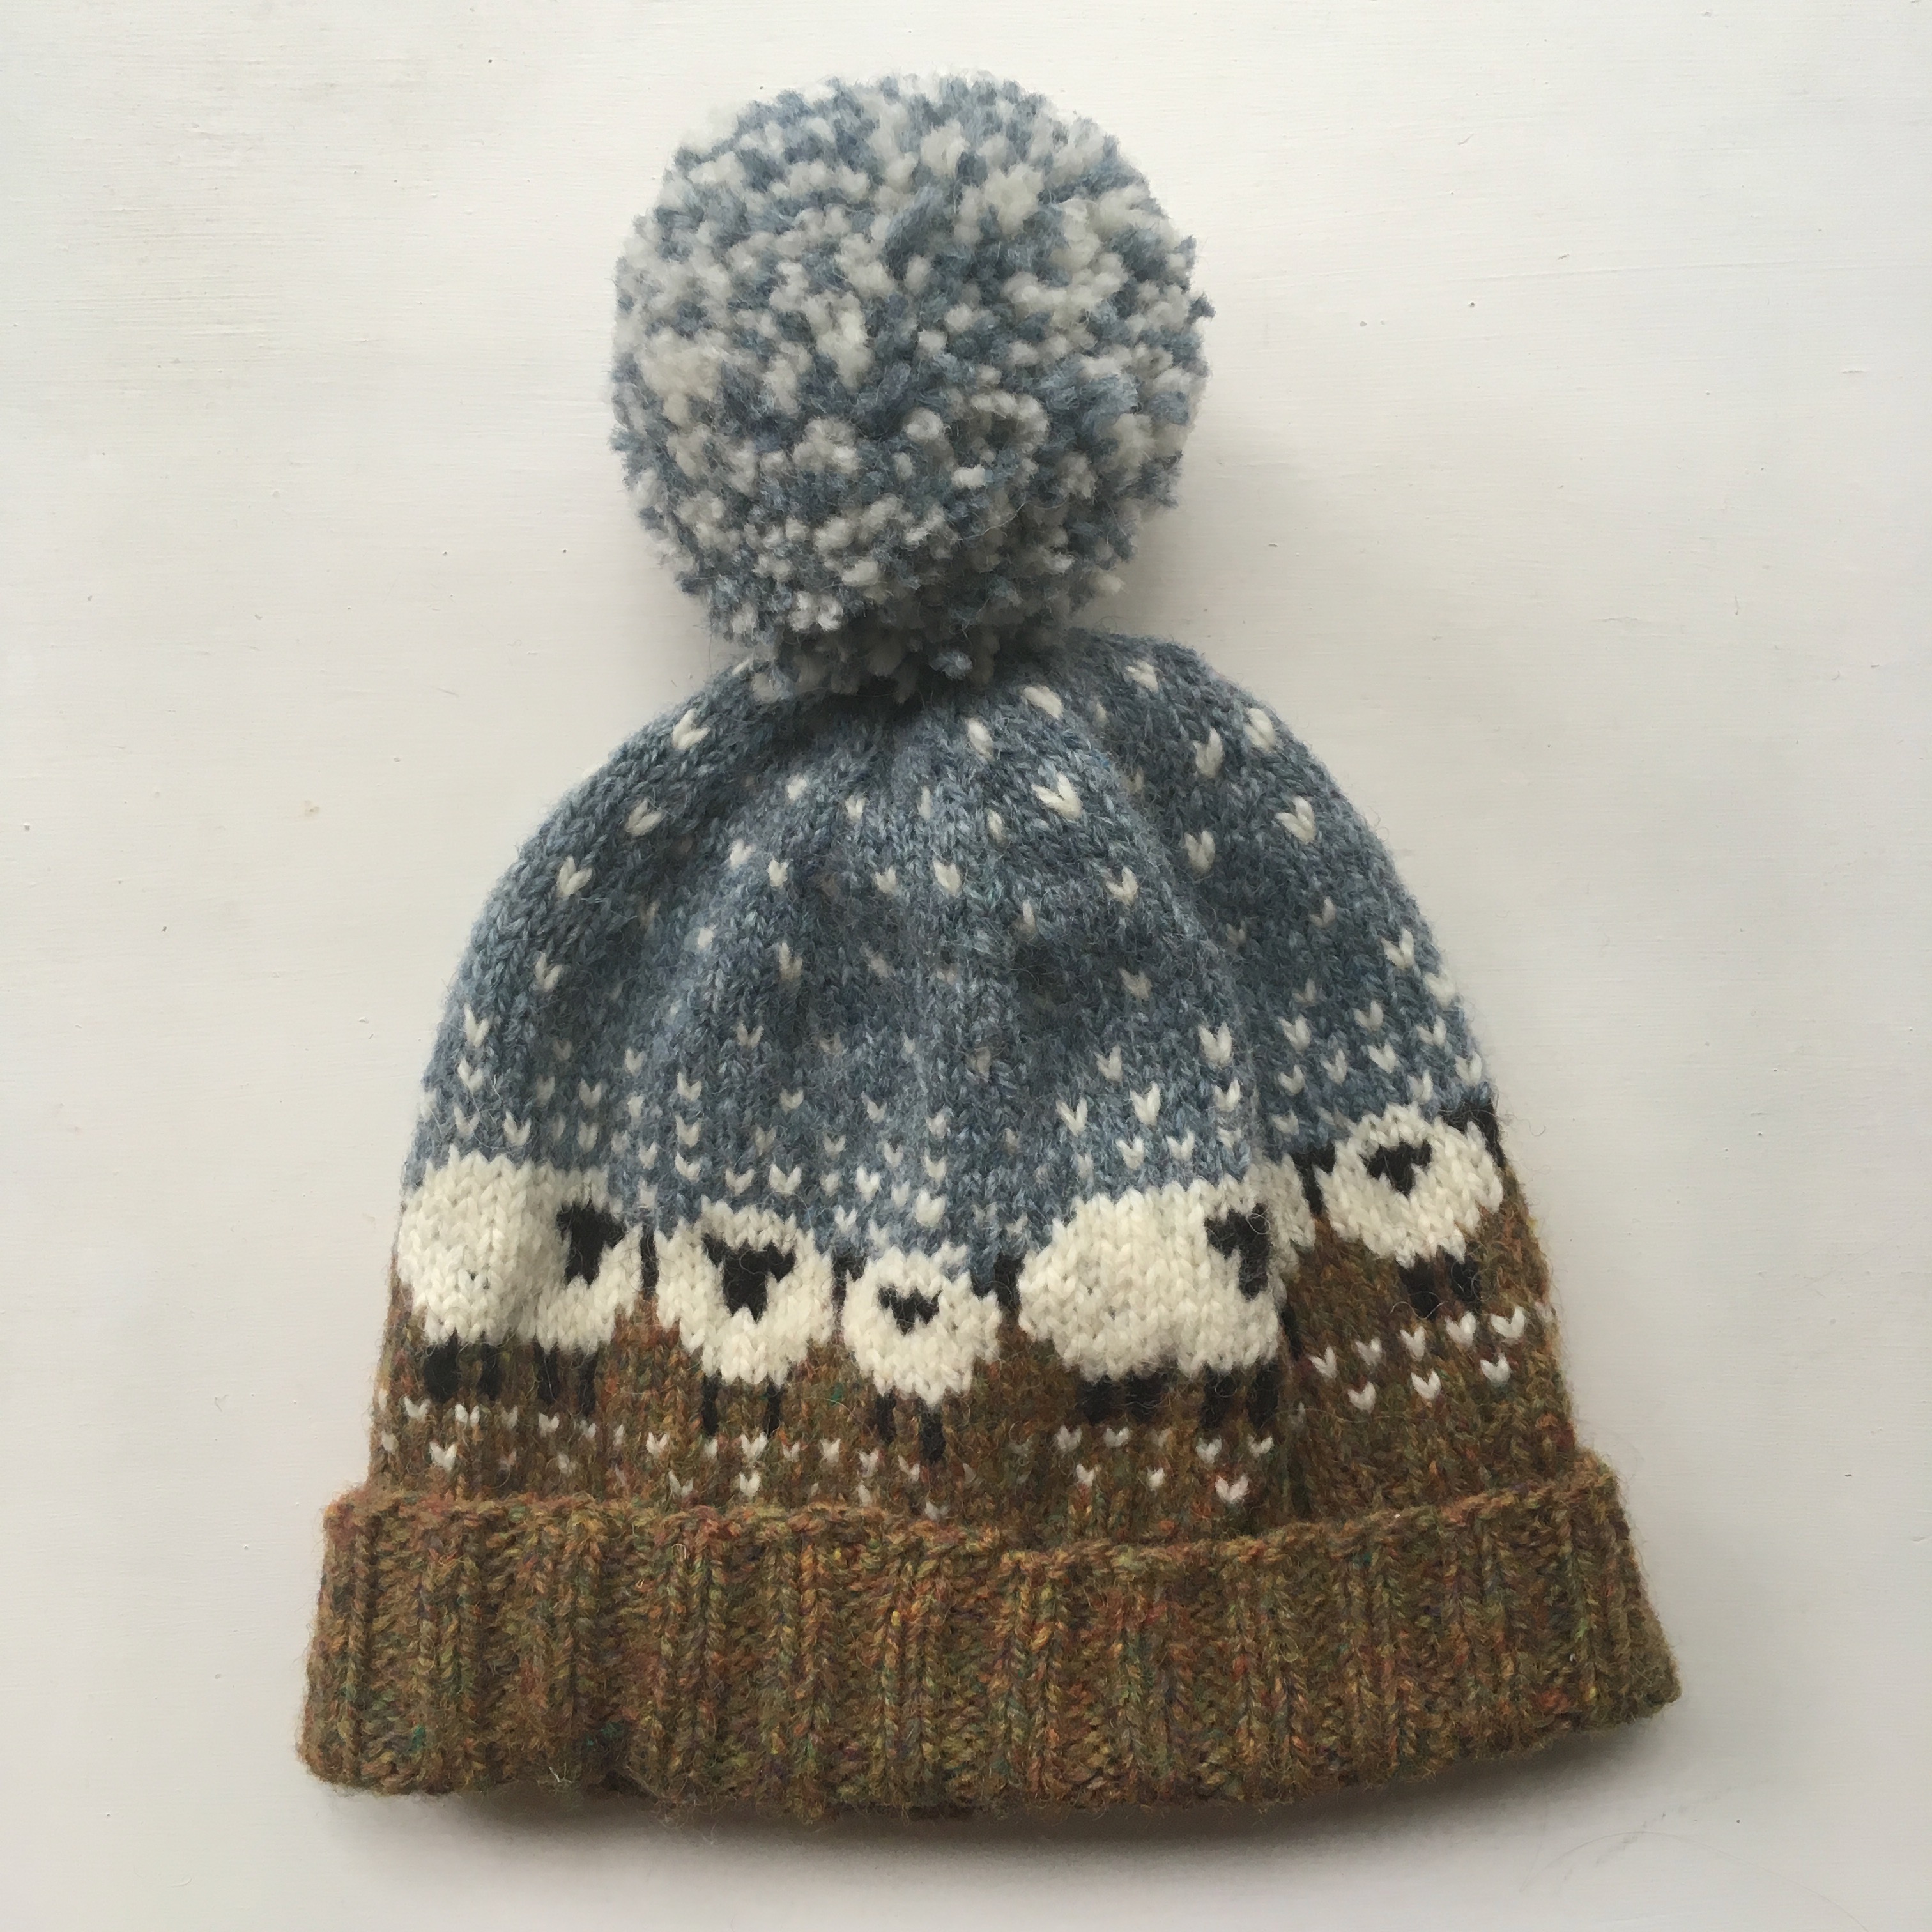
I’m pretty late to the party but my most recent knit is the Baa-ble Hat by Donna Smith. This pattern was released for Shetland Wool Week in 2015(!) and has become fairly iconic with 9,208 projects on Ravelry to date! How amazing is that!

I’ve had the pattern since it was released but never quite got round to making it until a friend admired somebody wearing one on a ferry and I thought it would a cracking Christmas present for her. Unfortunately, that was for Christmas 2018 and I have just finished it in August 2019! Whoops! Does it happen to anyone else that when you miss a deadline for a knit, you just stop knitting it and it takes a while to pick it back up?

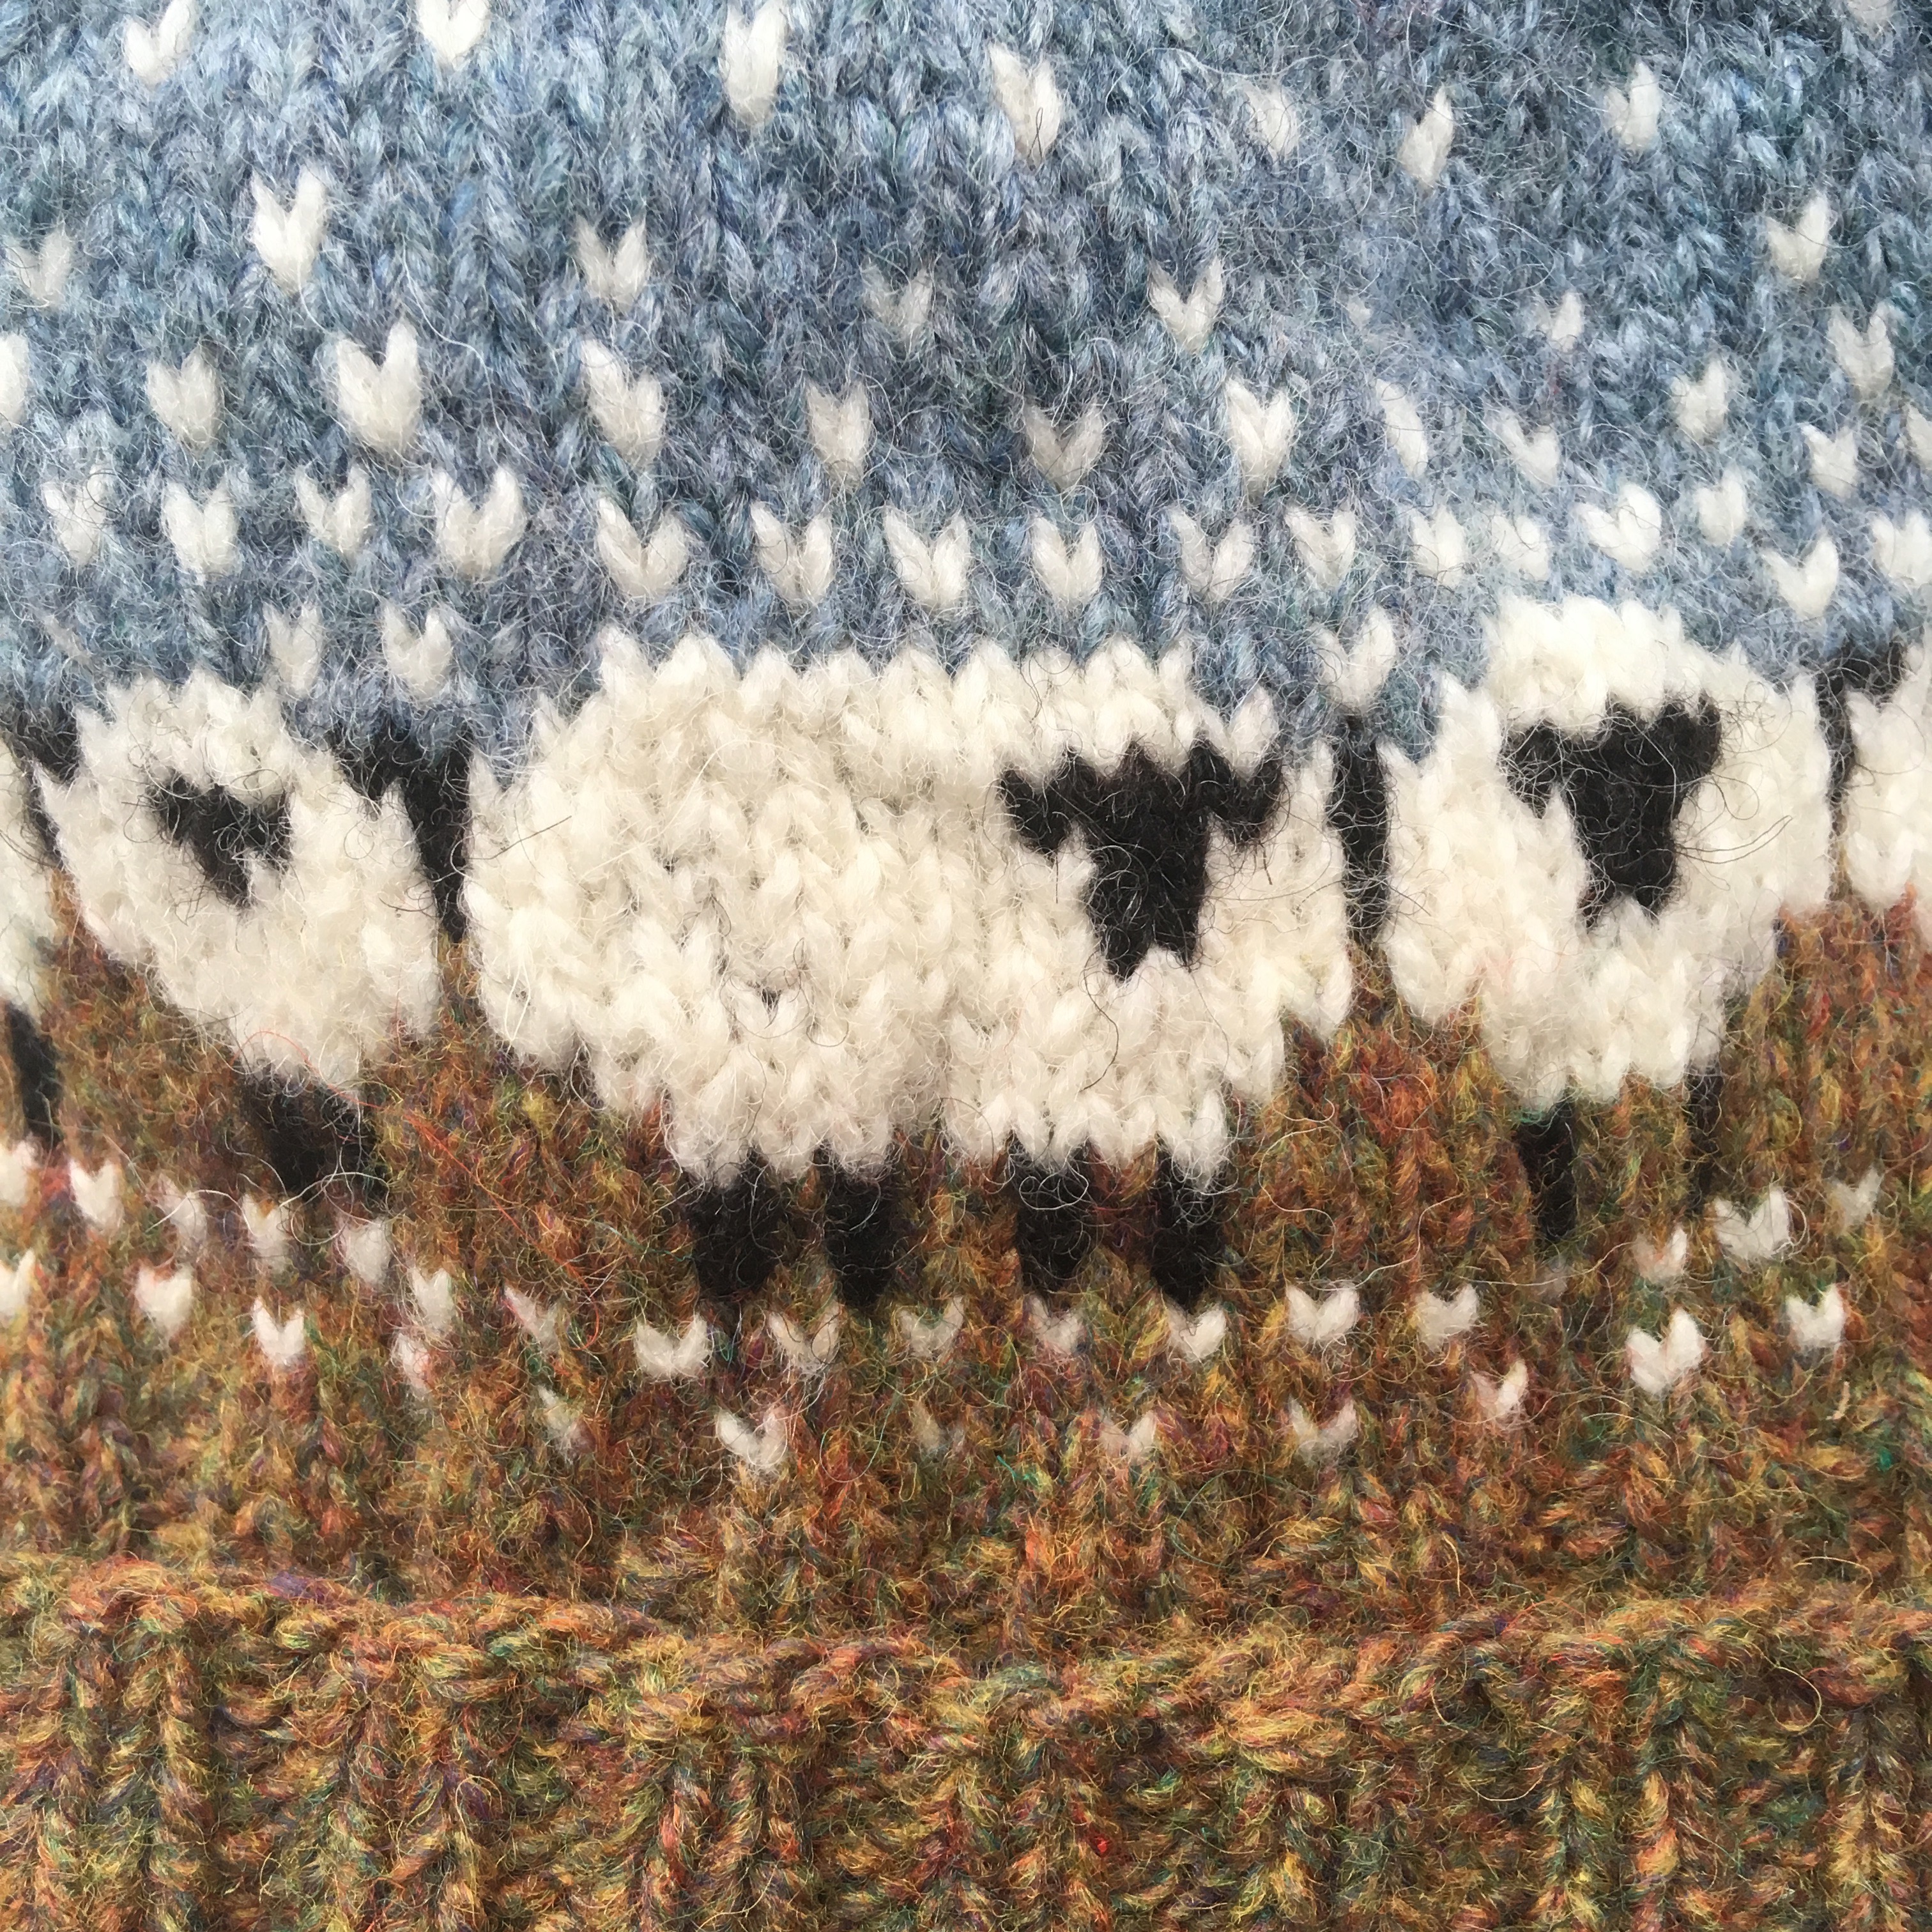
The pattern itself is a super speedy knit and apart from making a balls up reading the chart for the sky, it was a really easy knit. The mistake I made was accidentally adding more plain rows between some of the snow-in-sky rows. It was sheer laziness on my part not to take it back and I just tried to consistently make the mistake as I finished the hat instead! Not ideal but not a disaster either.

IMG_6369.jpg

I love the double brim of this hat and I’m pretty sure I’ll do that on all hats from now on. It’s just so cosy! I’m also a big fan of the colours the designer has chosen for this pattern. I would never have picked them myself (especially that grass colour) but they look absolutely fantastic together. Trying to improve my use of colour, and my confidence choosing colours, is something I’m really trying to work on so it was great seeing how somebody else does it.

With this knit, I’ve also realised I much prefer a colour work pattern where it’s easy to memorise the rows. I’m more used to the traditional repeats and I do find that easier than the odd numbers for sheep’s fluffy bodies etc needed in this pattern. That’s completely personal preference though and it was good to have a wee stretch out of my comfort zone.

All in all, I can completely see why 9,208 people have knitted this and I wouldn’t rule out knitting a few more!

Helpful Information

Pattern – Baa-ble Hat by Donna Smith 
Modifications – Em, do accidental additional plain rows between the snow-in-sky rows count as a modification?! Basically, I read the chart wrong and instead of taking it back, I just made the same mistake in the sky section consistently. I don’t think it affects it at all but I wouldn’t do it again!

Materials

Needles – I used 4mm and 4.5mm circular Addi needles bought from Jamieson’s in Lerwick.
Yarn – Probably the only time this has happened but I used the exact colours in the pattern! Jamieson’s Shetland Heather in 998 Autumn, 104 Natural White, 101 Natural Black and 1390 Highland Mist.

Knitter’s Block

I’ve always had a mental block about blocking but, no longer! Some projects really need blocking to look their best and the Gibbie shawl is definitely one of them. 1ply lace which looks amazing no matter what but is truly spectacular if you take the time to block it out properly.

I pinned it to foam play mats using T-pins and long blocking wires
Then left the blocked shawl to dry in the sunshine

This is the third time I’ve knitted this particular shawl and I enjoy it more each time. I am genuinely already planning to do it again as I still have some wool left over.

Finished shawl

The first try took me about a year from start to finish (longer than it took to grow the baby it was given to!). This attempt was ripped back more times than I can count and had so many ‘lifelines’ in it that it looked like I was weaving rather than knitting! Finished product (shown above) looked wonderful but my tension was a bit all over the shop as I wasn’t used to working with such fine wool.

The second attempt was quicker and I started to understand what I was doing more and how the lace pattern worked but my tension was still a bit off when I changed to smaller needles to knit the final few rows.

The third attempt I decided to do something a bit different, this pattern is usually knit from the outside in but I decided to try doing it from the inside out. There were a couple of reasons for this, 1) my tension change on the smaller needles made the decrease in each corner noticeably looser on inner rows, I thought knitting it ‘backwards’ might avoid this and 2) the initial set up was time consuming and tedious (harsh but fair I think!), a 16 line pattern of increasing and decreasing repeated 96 times to create a scalloped edge, then picking up 700+ stitches along the flat edge of this to start knitting the body of the shawl….snore. I usually ended up counting the stitches about 100 times before I was in a position where I could actually get going! So I thought I’d see how knitting from inside to out went.

Feeling very intrepid I turned to the back page of the pattern, cast on and tried to remember that K2tog meant M1 each time. It was great fun to knit this way as you feel like you’re getting somewhere much quicker, I used the pinhole cast on and went from there. It made it easier to set up the lace pattern as you can see where you are straight away and, as you’re starting on the smallest rows, it grows very quickly which was immensely rewarding. My tension was very consistent and by the end my grasp of the pattern was good and I felt so confident in the knitting I wasn’t needing to use life lines at all. A huge bonus as they take me ages! BUT I wouldn’t do it this way again. WHY? I can hear you ask, well, a renewed appreciation of the border which previously so annoyed me… let me explain.

Usually you knit the border in one long straight piece of knitting, then join it together to make a circle and pick up stitches along the inside (non-scalloped edge of the circle) to knit the body of the shawl. So your knitting goes in two directions – you can make out the join line between the scalloped edging (horizontal) and the body of she shawl (vertical) in the picture below.

First ever attempt, knit from the outside in

I hadn’t particularly thought about how I would attach the border to the body of the shawl when I started knitting, I assumed when I got there there would be a simple way…possibly there is but I couldn’t think of it (and I wasn’t knitting 96 individual scallops with their own cast on and offs each time) and with the Tiny Sleep Thief growing by the day I wanted to crack on with my next project and not sink too much time into a border I don’t love…so I just cast off. This is OK, I’ve got a neat cast off so it looks alright BUT it means that the finished fabric just doesn’t have the same stretch as the original pattern. As we use this for a swaddling blanket this is a bit of a shame. It’s fine, I’m sure the small person it’s going to will still like it and it’ll keep them warm when they’re wrapped up but I have definitely accepted that those incredibly skilled Shetlanders who came up with the pattern truly are the masters. They know what they’re doing, and they know why. No doubt they found the set up tedious too but now I understand why it’s the best way of doing things I’ll have no qualms sinking the hours required in to get it right. It is worth it.

Hints and tips – the pattern is pretty excellent and easy to follow once you’ve wrapped your head around it. I’d recommend using wooden needles as the wool is so fine it slips off metal ones! I used to do the middle on 2 circular needles, you could also use the magic loop, but my prefered way now (which I think is really why my tension has improved) is DPNs. I know lots of people hate them, I used to too but I’ve got better at them and now find that this is what gives me the best results and most even knitting.

This shawl is honestly one of my favourite things to knit and it’s really useful for anyone who plans to swaddle a baby. Not to mention it makes you look like an absolute knitting boss. You can buy the whole kit from Jamieson and Smith here. Their wool is perfect for the project as although it’s very fine it’s ‘sticky’ which makes the whole thing work and makes the end product perfect for a swaddle. The wool also has magical heat regulating temperatures for newborns.

Knitting Bliss, Debbie Bliss

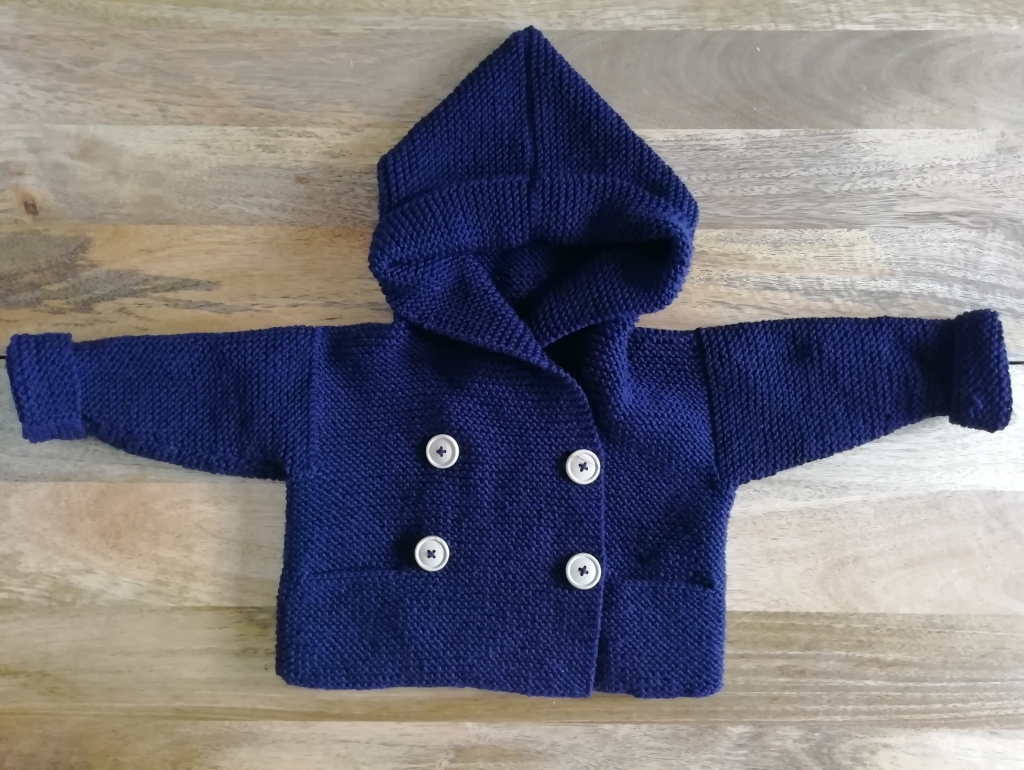
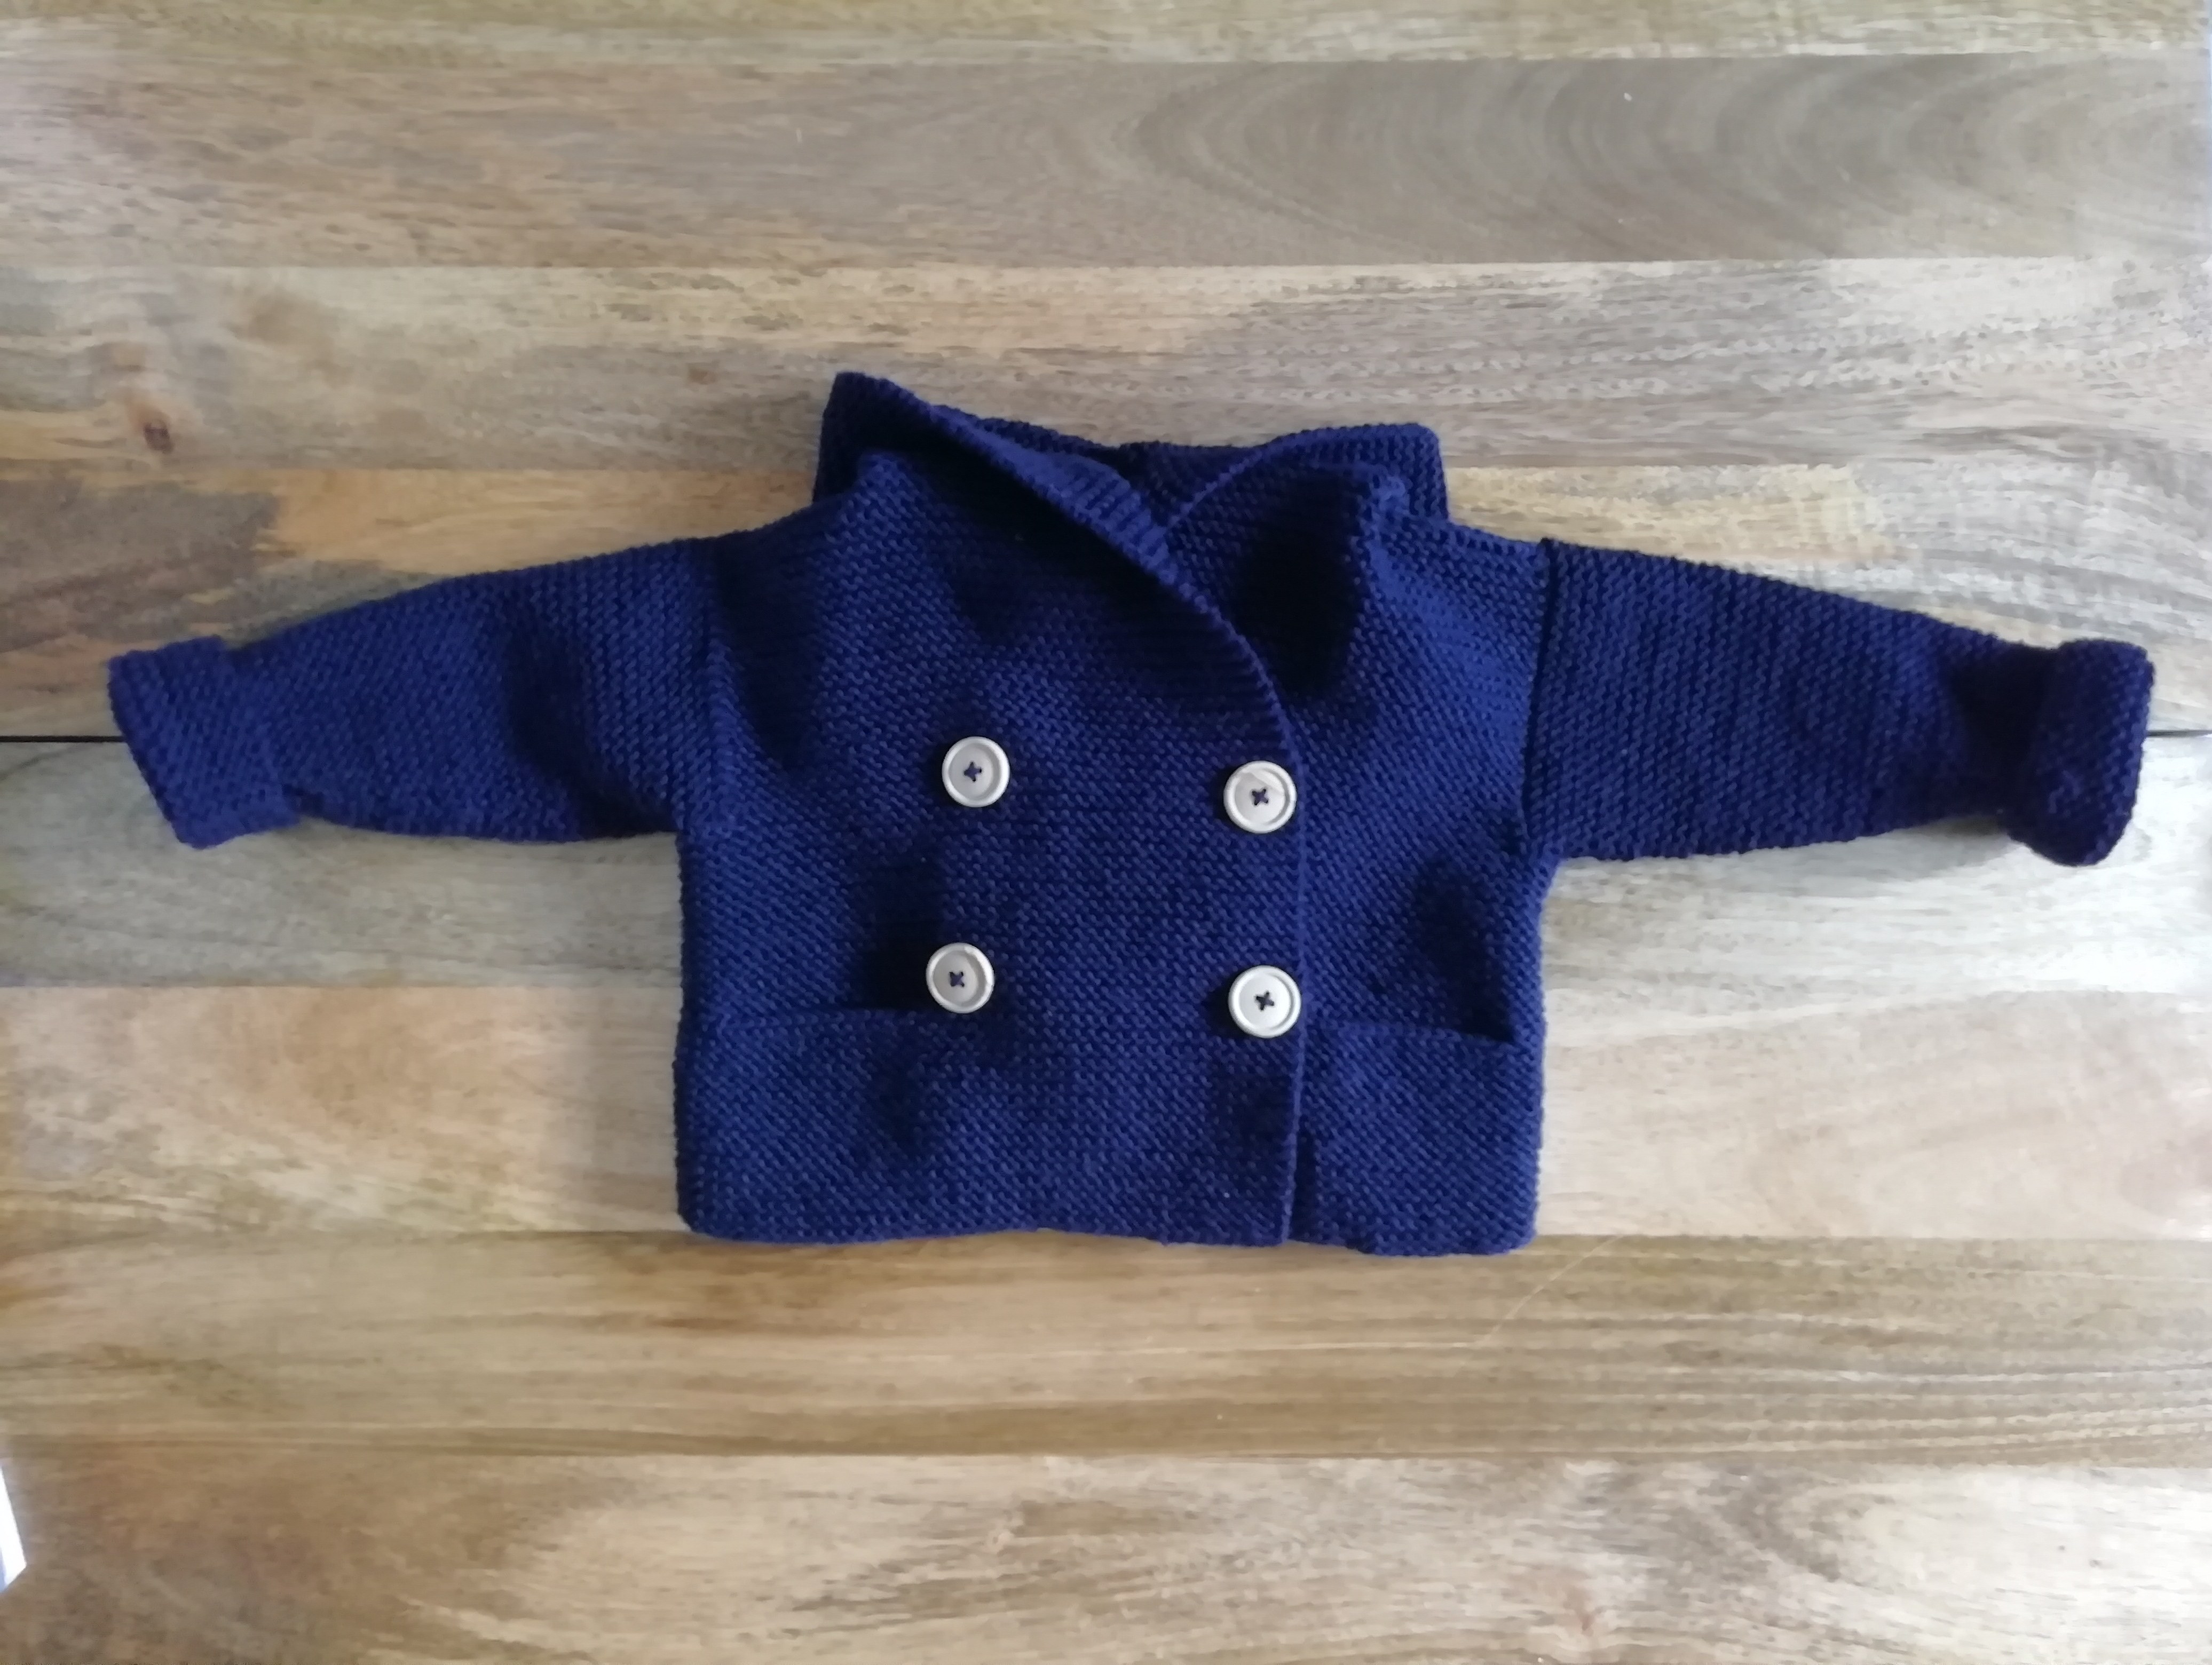
I wanted to make something for the Tiny Sleep Thief, but I needed it to be straight-forward because sleep deprivation renders my brain somewhat less functional than usual so I picked the Duffle Coat by Debbie Bliss and it was perfect!

Navy knitted duffle coat/jumper with wooden buttons
Debbie Bliss Hooded Duffle

The pattern was quick and easy to knit, it looks great finished and the instructions were clear to follow.

I used Debbie Bliss Rialto DK (actual bliss!) in navy. It’s a lovely Merino wool, very soft and cosy and a pleasure to knit with as well as being easy to wash (always a plus for kids’ clothes).

Usually when I’m knitting for babies if a pattern includes a pocket I don’t bother, I mean what are they keeping in there? Their house keys?! But I decided I liked the look of a pocket here to break up the monotony of lots of garter stitch. Turns out knitting pockets into a garment is super easy and I’m glad I did…and hey, now if the little one does need somewhere to keep treasures we’re good to go.

Inset Sleeve, button and pocket detail
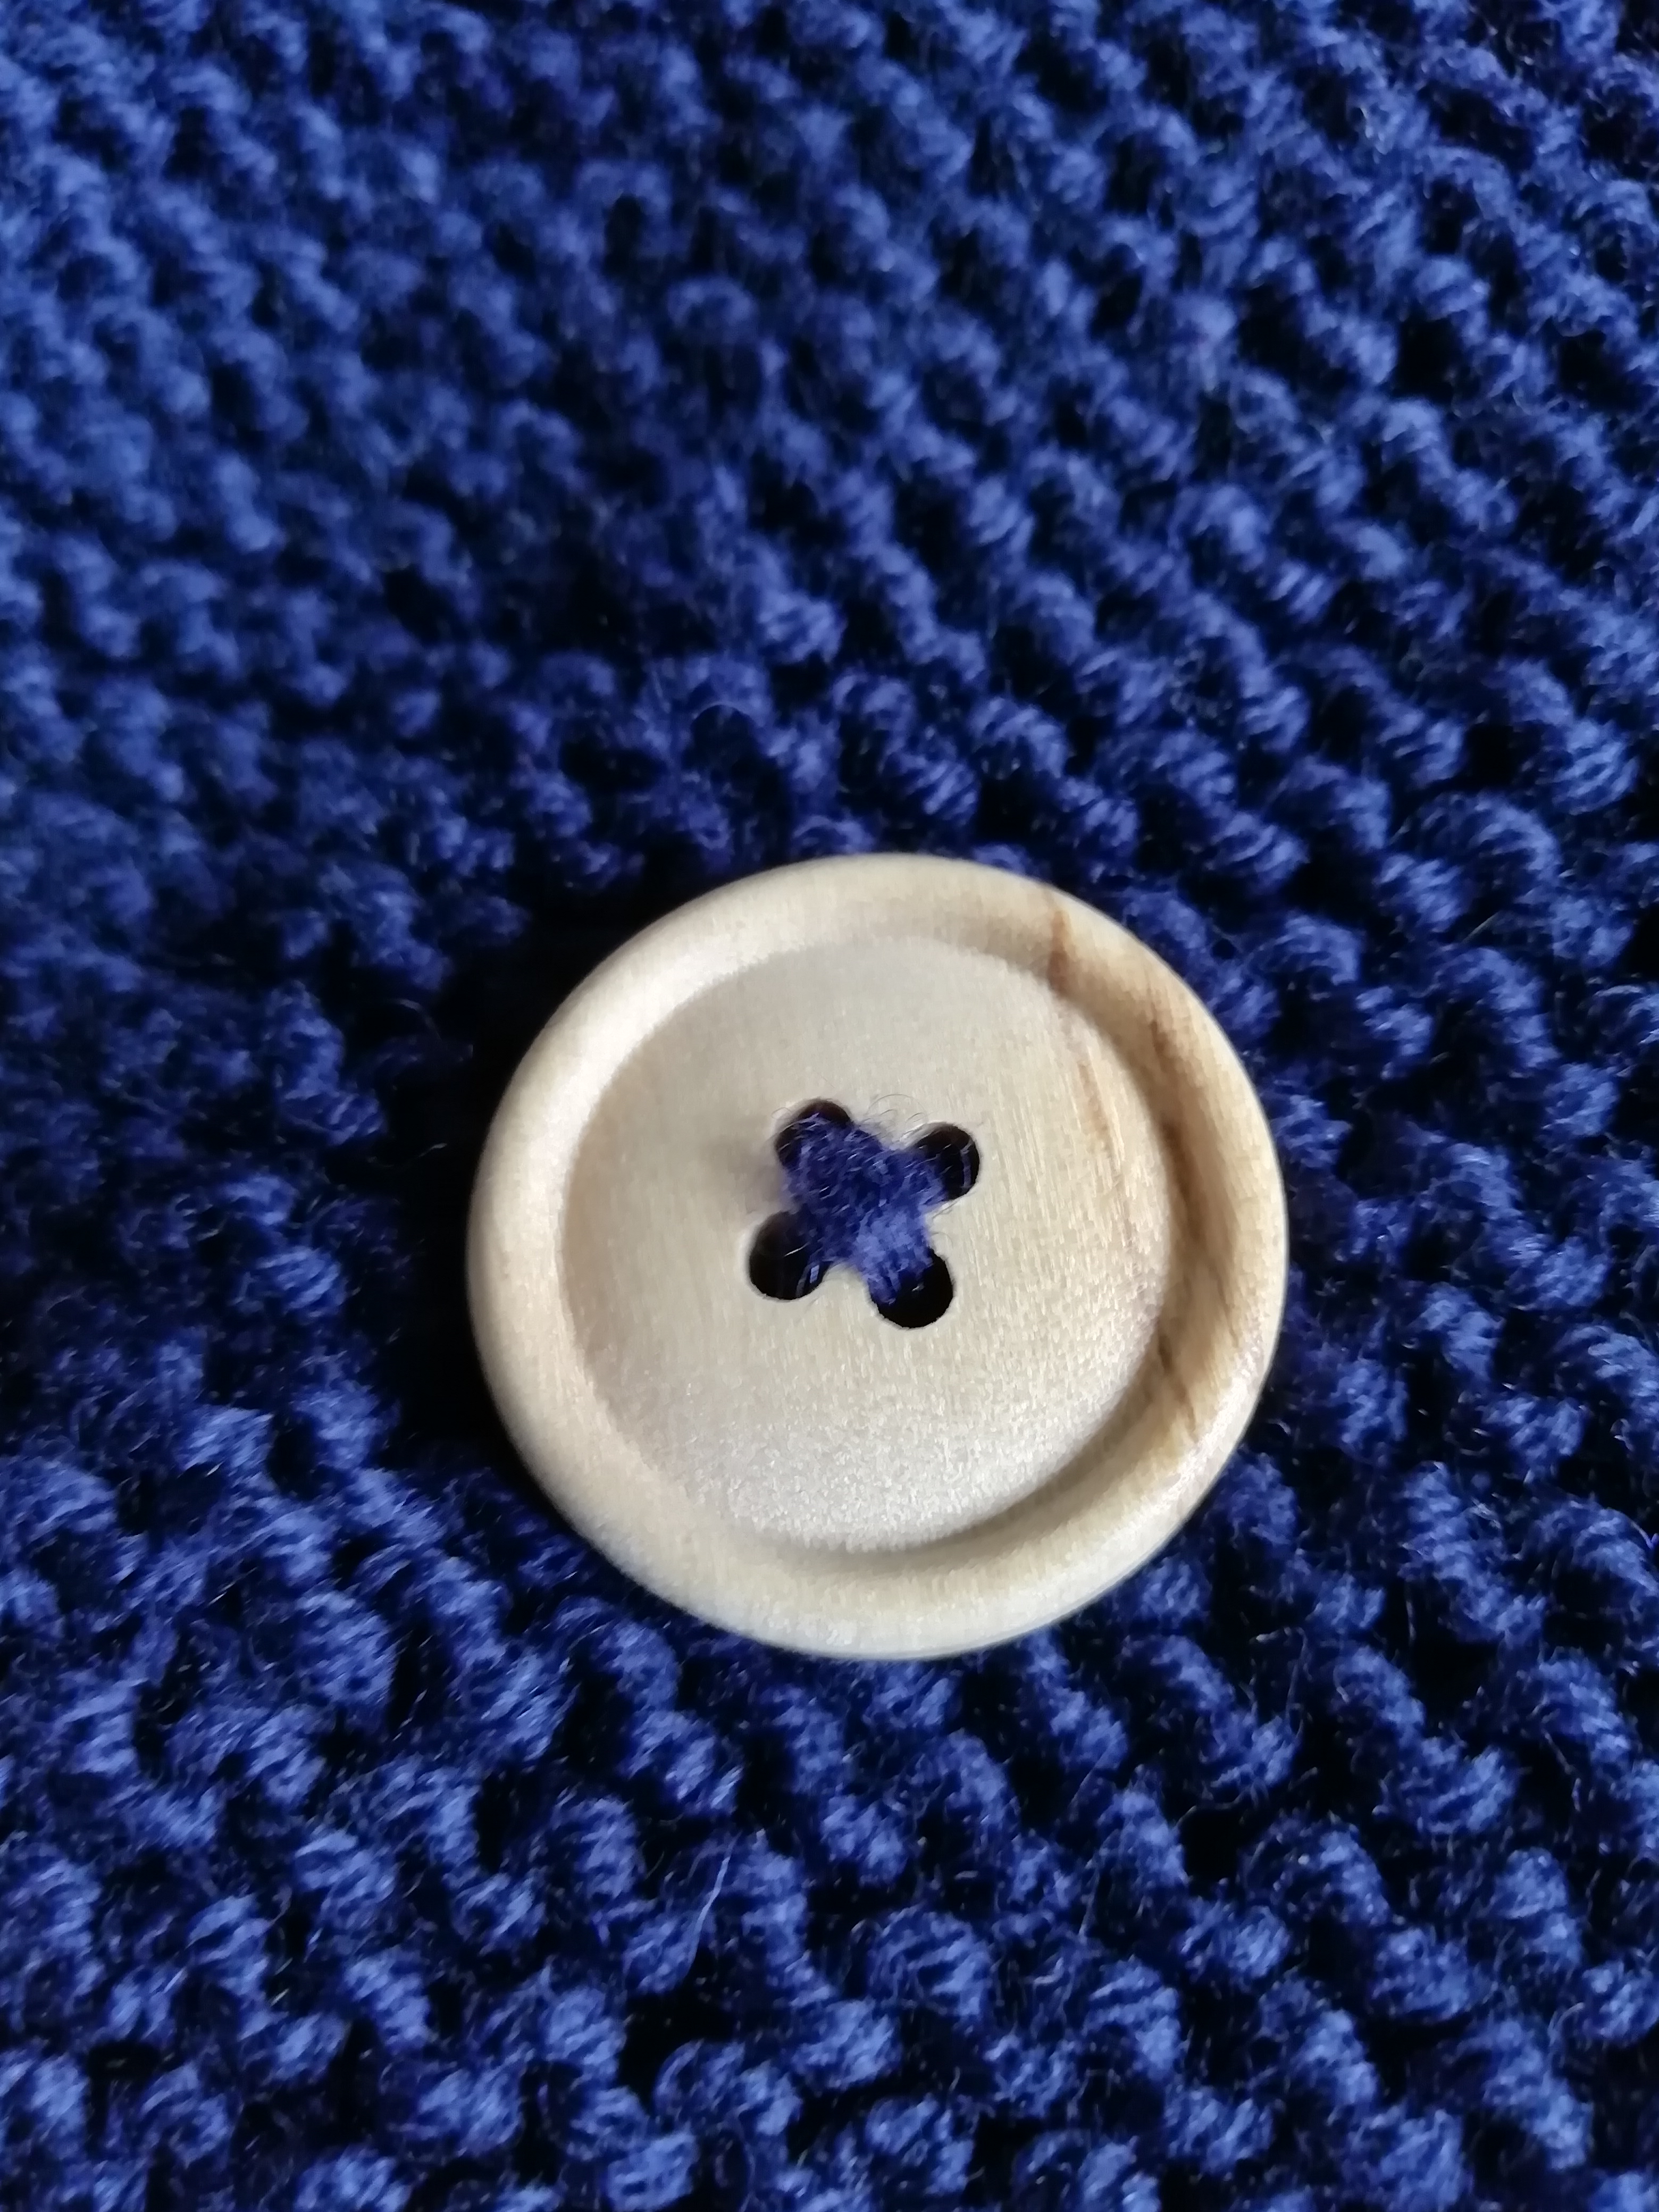
Wooden button against garter knitting
Wooden Button

I got some wooden buttons as I wanted something high contrast and I think they look grand, I have seen it with buttons the same colour as the fabric which also looks lovely so it’s really just a matter of taste.

The finished result was exactly what I’d hoped for, the little one looks very snug in it and I had fun making it. It’s easy to bundle a babe in to and out of, and using smaller needles to knit part of the cuff helps keep the rolled back sleeves in place – I’d definitely use this technique again. Since finishing it I’ve seen a version knitted in red which, with hindsight, I might have preferred but overall a success! Definitely recommend.

Navy knitted duffle coat/jumper with wooden buttons
Knitted Duffle Coat

Materials

  • 3.25mm and 4mm needles
  • 4 buttons
  • DK wool – I used Debbie Bliss Rialto DK in Navy (17)