Shetland, Shetland, Shetland

While the wonderful Shetlander has been smashing the Bousta Beanies I’m still stash-busting. I expected this to be a bit of a slog but actually I’ve been really enjoying looking at what I’ve got and trying to work out what it can turn into.

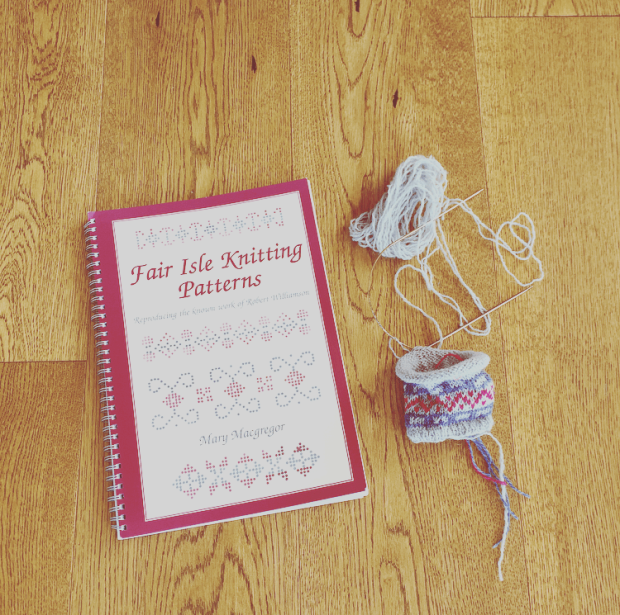
A year or two ago I was given some lovely grey Jamieson & Smith Shetland Heritage wool for my birthday (thanks Shetlander!) and it has been waiting to be turned into hand-warmers ever since, but I hadn’t yet found the right pattern. Finally, in the spirit of stash busting I decided I was just going to wing it and see what I could come up with.

I cast on some stitches and started knitting, using a lovely Fair Isle pattern from one of my favourite books Fair Isle Knitting Patterns by Mary Macgregor (again, thanks Shetlander!) to introduce a bit of colour. They started to look a little something like this…

Fair Isle Hand-warmers
Faking it until you make it…or if not quite ‘it’ at least make something.

…I was quite pleased with them but then…game changer, this year’s birthday present from the Shetlander arrived (more thanks!) in the form of Pom Pom Quarterly.

Pom Pom Quarterly
Pom Pom Quarterly

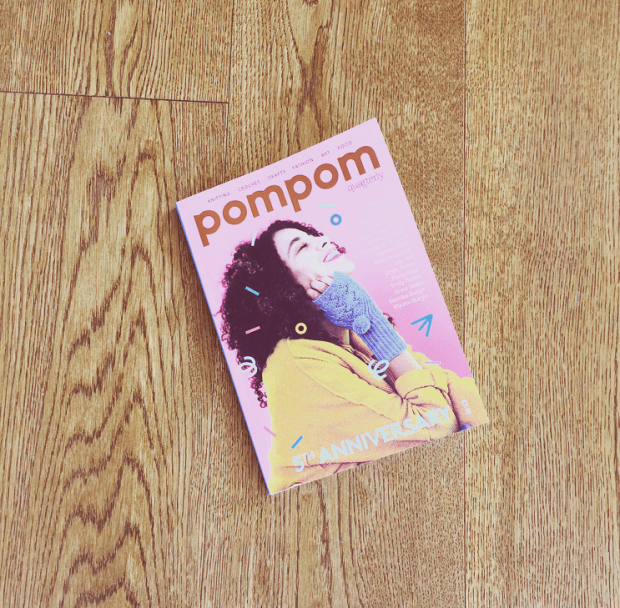
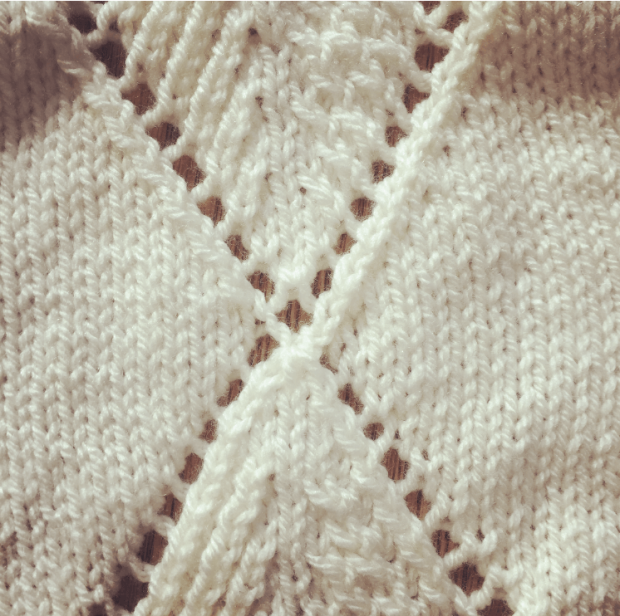
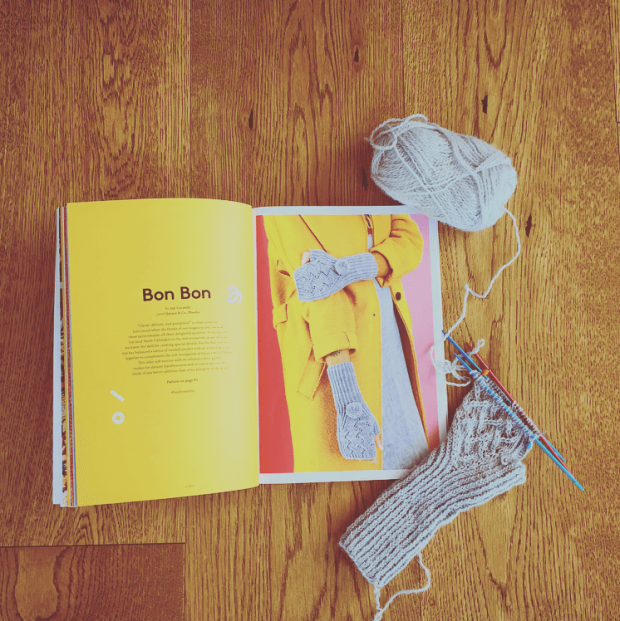
As soon as I saw the pattern on the front I knew things were about to change. I moved my knitting-up-slightly-too-big-but-will-be-fine-if-I-fleece-line-them hand-warmers onto some spare needles and cast on again, this time using the magazine’s Bon Bon pattern by Joji Locatelli 

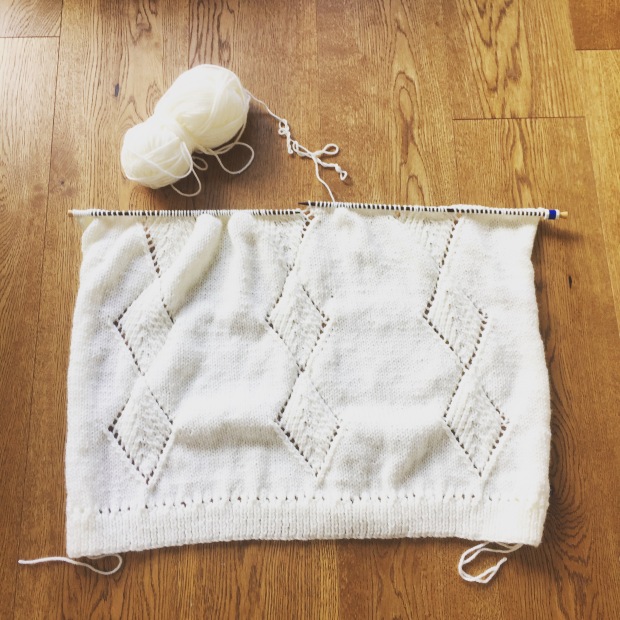
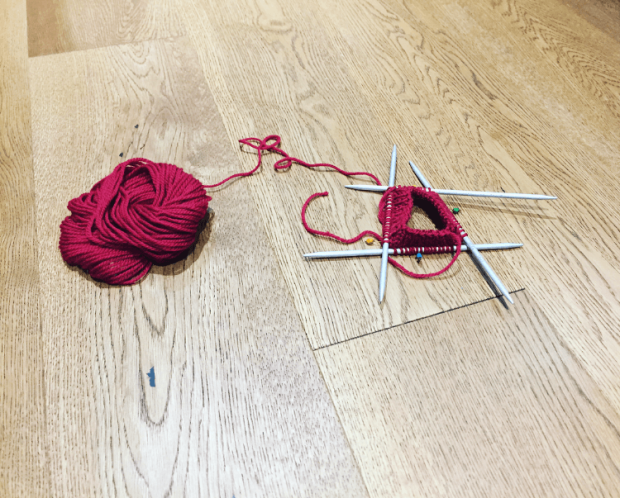
This pattern has surprised and challenged me; I’ve learned new skills – twisted rib – and it’s required way more concentration that I expected it too. But I’ve also enjoyed it more than I thought I would and I’m really pleased with how it looks now (just about to cast off number one and do it all over again).

In the end I unravelled my first attempt and started again from the very beginning – my initial twisted rib was a bit scrappy and I got confused with the pattern and forgot where I was so I thought it was better to pull it out and have another go. I’m so glad I did, the second attempt has come out much better. My early struggles were, I think, partially to do with having to turn the page in the magazine at crucial knitting points to see the charted pattern. Apparently I’m an impatient knitter and this threw me out of my knitting stride. The solution was to cut the pages out so I could lay them out in front of me, this really helped. I also got strict about ticking off the rows on the pattern as I went along so I didn’t lose my place. A good lesson in not getting complacent while you knit!

Bon Bon
Bon Bon

Helpful Information

Knitting level – strong intermediate
I had never done twisted rib before, at first I found it fiddly but you get used to it and also, it looks great!
Tick off the rows as you go along to help you keep your place in the pattern – I’m not usually strict about this but it really helped me here.
Pattern – Bon Bon pattern by Joji Locatelli
Cast on – long tail, this video from Wool and the Gang is the Shetlander’s favourite which seems appropriate
Cast off – normal keeping to twisted rib

Materials

3mm DPNs or circulars – I used (of course!) my favourite Addi DPNs
1 skein DK weight – e.g. Jamieson & Smith Shetland Heritage used here in Silver Grey
5 x stitch markers, trust me they are important
Scrap yarn/stitch holder – I used scrap yarn and think a stitch holder would have got in my way here


Done is better than perfect…sometimes

To my surprise I started knitting another baby blanket as soon as I’d cast off the last Vivid square (full disclosure, I can’t lie to you dear reader, I still haven’t blocked or made up that blanket but I will that’s what bank holiday weekends are for). I didn’t particularly have anyone to knit it for, I just had loads of wool left over and I liked the pattern so off I went.

X marks the spot
Stocking stitch with a simple lace pattern

Anyway, last weekend I made a TINY mistake. Literally even I wasn’t quite sure it was there, I showed my mum, she couldn’t see it.

I carried on knitting.

Four lines later (and each line is 127 sts, so that takes a while) it was still niggling at my brain. I can be a bit of a perfectionist sometimes but I genuinely think part of what makes hand knitted items so lovely is the odd mistake, they give it an extra bit of character. The rational part of my brain nodded along with that.

‘Done is better than perfect,’ I thought.

Unfortunately the irrational part of my brain took control and I was still smiling and nodding, ‘done is better than perfect’ while I ripped back 4…5…6…I’m not even sure how many lines at that point and started to reknit that section of pattern.

Now here we are, a week down the line and after a super busy weekend and some very careless knitting over tea I find myself with an extra stitch. I need to emphasise it’s between the pattern repeat and as such completely unnoticeable. The thing that is annoying me the most is that I can’t figure out where it happened. I think I missed a decrease rather than picking up a stitch somewhere. But after careful inspection I’ve decided if I can’t spot where it is, it doesn’t matter – no one else will either. So, you know what? This time my rational brain is going to call the shots and I’m going to keep going because, overall, done is better than perfect….and with a cheeky extra decrease no one will ever know…Except you lot, because I told you. Shhhhh….

IMG_4607
Done is better than perfect…

Pattern

Diamond blanket by Style Craft – I can’t remember where I originally found this pattern but here it is on Ravelry

Materials

Yarn – Paintbox Yarns Simply Aran in Colour 202

Needles – Lantern Moon Ebony I love working on wooden needles and these ones are absolutely beautiful. They are a bit of an investment piece but I have had mine for about ten years so they are worth it! I’ve used 4.5mm and 5mm which is correct for the yarn I’m using but larger than the pattern suggestions

Hints and Tips

It’s a great pattern and very straight forward to follow once you’ve got used to the terminology (well T2L/T2R was new to me anyway). Clearly don’t knit tired or you end up with more stitches than you should!


Hermione’s Everyday Socks (a.k.a. total brilliance)

IMG_7323

Socks have always scared me. I’ve thought a lot about making them. I’ve saved 15 patterns to my Ravelry queue. I’ve admired (and joyfully worn) the beauties made by others. But I’ve always felt the fear and avoided making my own.

When I thought about it, my sock knitting fear is based on two things. The main one is the fear of picking up stitches along edges. I will go to great lengths to avoid this and have been known to do an entire baby blanket border using intarsia to avoid having to pick up stitches at the end! In the same way, I tend to avoid knitting anything that needs two of something that look roughly the same because I have only rarely managed this feat (and even then only with a lot of blood, sweat and swearing).

So the obvious time to solve your fear of something is when doing some gift knitting against the clock, isn’t it? Way to make things easier with a bit of time pressure! My best friend’s birthday was in March so I naturally decided in the middle of February that knitting a pair of something would be a great idea.

Once I’d settled on socks, picking a pattern was really easy. Hermione’s Everyday Socks is the most knitted sock pattern on Ravelry by a considerable distance. Throw in that my best friend and I have been Harry Potter addicts since the books first came out and the choice was simple.

IMG_7248.jpg

This pattern is absolutely wonderful and I can’t recommend it enough. The instructions are clear and the textured stitch pattern comes up beautifully. Overall, it was a really great knit – engaging enough to keep your interest without being too overly taxing. Seeing all the stages of the sock come together from the ribbing to the toes was also pretty gratifying and helped me to just about stick to the strict row knitting schedule I’d invented!

Finding yarn was a different matter though. My best friend’s favourite colour is red but I really struggled to find a suitable strong red to knit with. In the end I went for a skein of Madeline Tosh Sock in the shade Tart. I’m really pleased with the results and I particularly love how the semi-solid red shades have worked out with the textured stitch pattern. That said, I definitely prefer to knit with more rustic wool and I found the slipperiness of the Merino a bit hard going. If anybody can tell me where to find a good strong red yarn (preferably British), please let me know!

IMG_7279.jpg

I followed the pattern for the ankle but shortened the number of texture repeats to 12 instead of the recommended 18 as I was a wee bit afraid I’d run out of yarn. Weighing the yarn as I went along helped me to feel a bit more confident that there would be enough for two socks and in the end, I had just under 20g spare.

The heel wasn’t too traumatic when I got down to it and was mostly just a case of following the instructions without reading too far ahead! I knitted the socks using the magic loop method and then switched to two 2.25mm circular needles when the stitches were split for turning the heel. I still wouldn’t call myself a fan of picking up stitches but I googled furiously and used the advice on this Purl Soho page to help me get the stitches picked up evenly. The socks do have a tiny ridge inside where I picked the stitches up and I’m not quite sure if/how to stop that happening again another time. Hmm, something to work on!

Fortunately, the socks have come out pretty close to each other in size and the fit is really good, although that was more luck than skill. They took about 3 weeks to knit in evenings/weekends and were just a really great knit. For now, I think the sock fear may be conquered but I should probably cast on another pair immediately to check right?!

Helpful Information

Pattern – Hermione’s Everyday Socks by Erica Lueder
Modifications – I knitted 12 pattern repeats on the ankle instead of the 18 suggested in the pattern. I also knitted the sock for a size 8 foot and mostly worked this out by making my dad try them on to see if they looked alright! Overall, the bottom of the foot measured  11 inches in length including the toes.
Cast on – long tail cast on. I use this video by Wool and the Gang whenever I need a reminder.
Cast off – grafted the toes. This Knit Witch video is the best tutorial I’ve found and I have probably watched it upwards of 100 times by now!
Heel help – I used this Purl Soho page to help me work out how to pick up the heel stitches but I’d be really interested to hear any tips about how to do this.

Materials

Needles – 2.25mm Addi Turbo’s bought from my local Jamieson and Smith wool shop
Wool – one 115g skein of Madeline Tosh Sock wool in the shade Tart purchased from Meadow Yarns. I was terrified I’d run out of wool but I ended up with just under 20g left.

The Weasley Jumper

A Weasley Jumper – for those of you who don’t know – is a jumper hand/magic-knitted by the witch, mother and all around hero, Molly Weasley, in the Harry Potter books. She gifts them to her nearest and dearest at Christmas and they famously bare a yellow initial – particularly useful in telling apart her identical twin sons, the mischevous Fred and George. In my humble opinion, if this is the first time you’ve heard of Weasley jumpers you should stop reading this, track down all 7 Harry Potter books and lose your self in J.K. Rowling’s magical world for a few days. Come back when you’re up to speed on the fabulous knitwear of the Weasley matriarch.

IMG_4477
Weasley Jumper – the finished product

I was pretty excited when a friend and fellow HP fan announced she was expecting a new arrival, and a Weasley jumper seemed like an obvious choice of gift. A quick search on the google and I found this pattern via A Modern Homestead which is great. It knits up super quickly, is pretty easy if you’re comfortable working in the round and now that I’ve finished it I can affirm it looks brill. I’d also never done a raglan jumper or a top down jumper so it appealed from that perspective too.

You need a good stretchy bind off for the cuffs and bottom of the jumper, I did some googling and found one I liked (more details below) but it’s something I always struggle with so would love to know if you can recommend any others Shetlander/dear reader?

Victoria at A Modern Homestead suggests some tweaks to the pattern on her site, some of which worked for me, some of which didn’t, my hints/amends are below:

Tips and suggestions

  1. Long tail cast on works perfectly
  2. 4 rows of ribbing at the neck, nice amount but not a full turtle neck
  3. 12 rows of rib on sleeve cuffs and ditto at the bottom of the jumper
  4. Casting off – [k2tog, pass stitch from right needle to left, K2tog]. Nice stretchy bind off that looks good.
  5. I used duplicate stitch to sew the initial and that worked beautifully – highly recommend.
  6. Sew the letter as it looks right to you, I tried charting but ultimately just sewed what looked right and they’ve all been a bit different. I started 16 rows down from the edge of the neck ribbing and the size has varied slightly depending on the letter I’m doing. M and J were both 14 rows high, J was 8 stitches wide, the M was 16: A and Z which you can see here were 18 high by 19 wide and 22 high by 13 wide respectively.


Two red hand-knitted Weasley jumpers
I loved the pattern so much I ended up making two – clearly my tension changed between them as one came up much larger.

Helpful Information

Pattern – Weasley Jumper
Level – Easy Intermediate (you need to be confident working in the round)
Cast on – long tail; the method I use is well described in this video
Cast off – k2tog, pass new stitch to left needle, k2tog etc.; full description here
Duplicate Stitch – great for the initial, instruction video here

Materials

  • Needles – 4mm DPNs/circulars; 5mm DPNs/circulars
  • Wool – I used about 3 balls of Rico essentials, soft merino aran in Brick Red for the body. The letter was same yarn in Sun Yellow – if you had right weight and colour in your stash you could definitely use that. Rico essentials soft merino is a superwash wool so good for little ones. Usually I’m a buy in store type but I couldn’t find anything that was quite right in the shops so I purchased from LoveKnitting.com and it was perfect
  • Stitch holders/scrap yarn to put the sleeves onto while you knit the body
  • Darning needle for sewing in your ends

Thoughts on knitting in the round
I played with DPNs at the beginning but mainly used Addi turbos (my favourite circulars), using two pairs to make a loop until it was big enough to go down to one needle. If you’re not familiar with the method, video here. That’s usually my favourite way of doing things although I am warming to DPNs. You could also use the magic loop method if that’s what you’re used to.

First attempt at using DPNs to cast on for a baby's jumper
DPN Jumper Cast On